

)
Table of Contents
Dynamics 365 Customer Service with Power Virtual Agents - Part 2 (automation with voice/voice bots)
This article is the second part of a Kickstarter of two pieces and part of my “Dynamics 365 automation with bots/voice bots 101” series.
In this article, I will focus on Dynamics 365 Customer Service with telephony and the integration of voice-bots with a handover to a human agent.
Prerequisites
Please follow the instructions of the first part, “Dynamics 365 Customer Service with Power Virtual Agents - Part 1 (automation with text chat)”, to create a Dynamics 365 Customer Service environment and configure the handover with a bot.
We work here with two queues, one for the user calling the voice bot, the voice bot being the one and only agent, and a second queue for the handover to the human agent(s).
Enable your Dynamics 365 Customer Service environment with Voice.
In part one, we created a free Dynamics Customer Service trial; with this trial, you will get sixty free minutes of PSTN Calls (US Toll-free Numbers)
After 60 minutes, you can bring your SIP-Trunk via Azure Communication Services or buy a dialing plan via Microsoft. If you are in Europe, you must go with the SIP-Trunk integration. This is a straightforward and menu-based setup. Your SIP-Trunk provider should give you an FQDN of “your” Session Border Controller and a Port.
Configure Dynamics 365 Customer Service
Configure Azure Communication Services’ direct routing
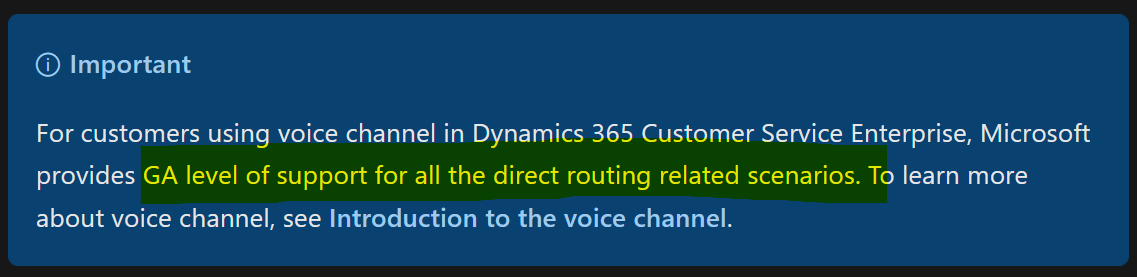
Remember, even if it says preview, the combination of D365 and ACS direct routing is full GA.
Go to your OmniChannel Admin Center
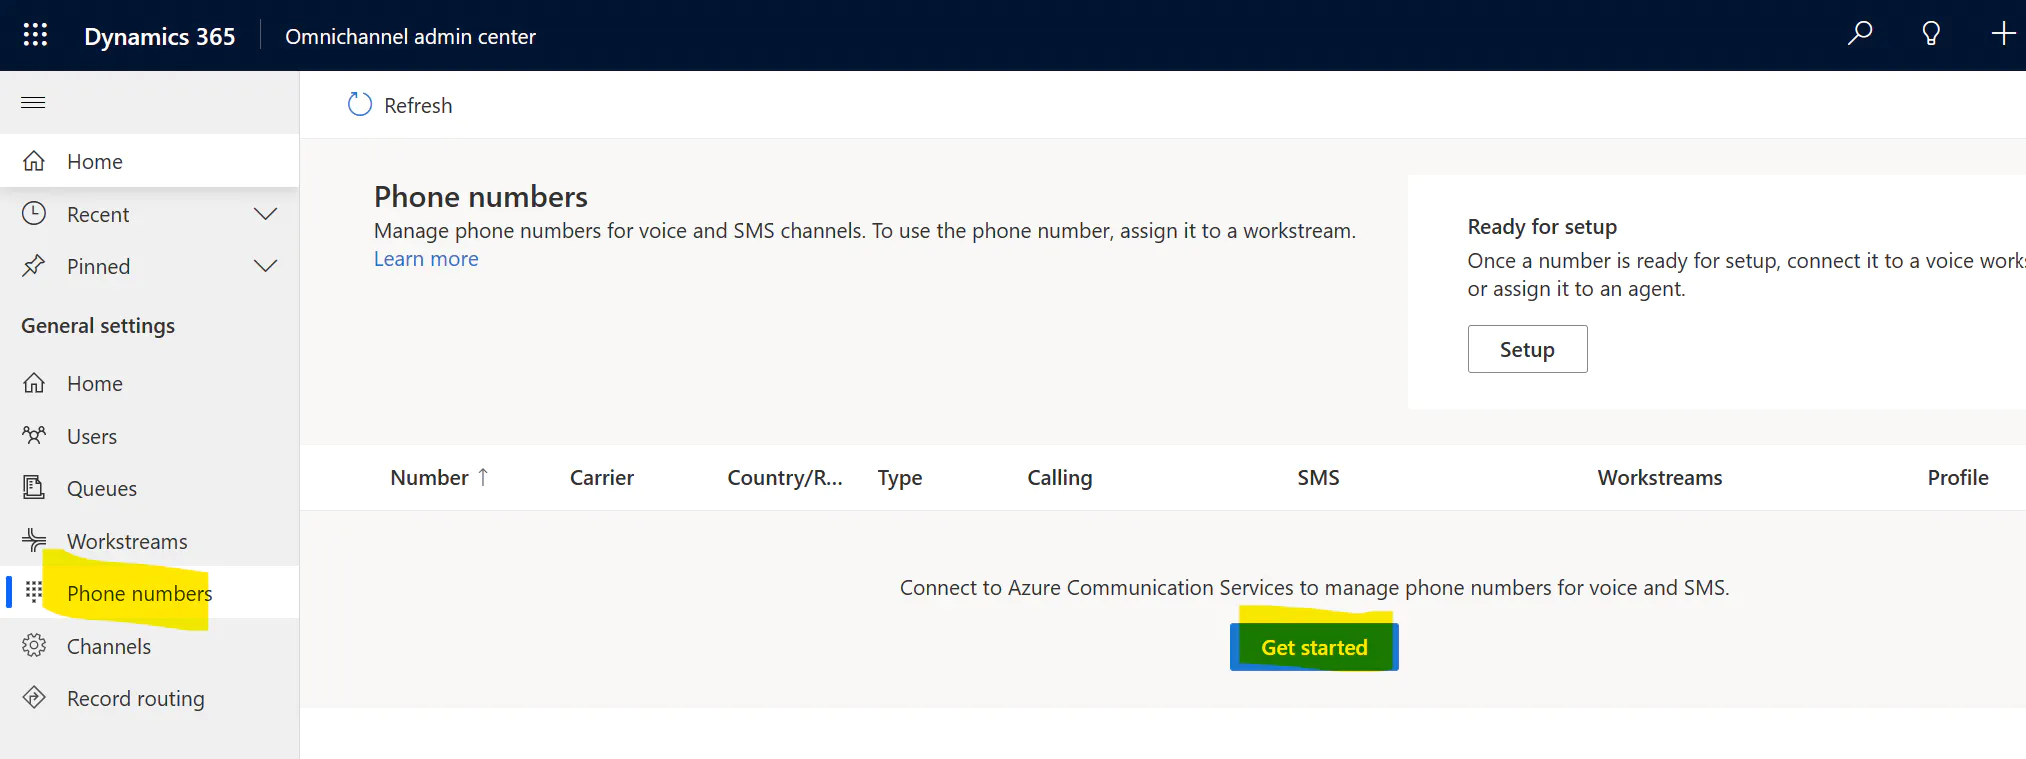
Figure 1: Add ACS
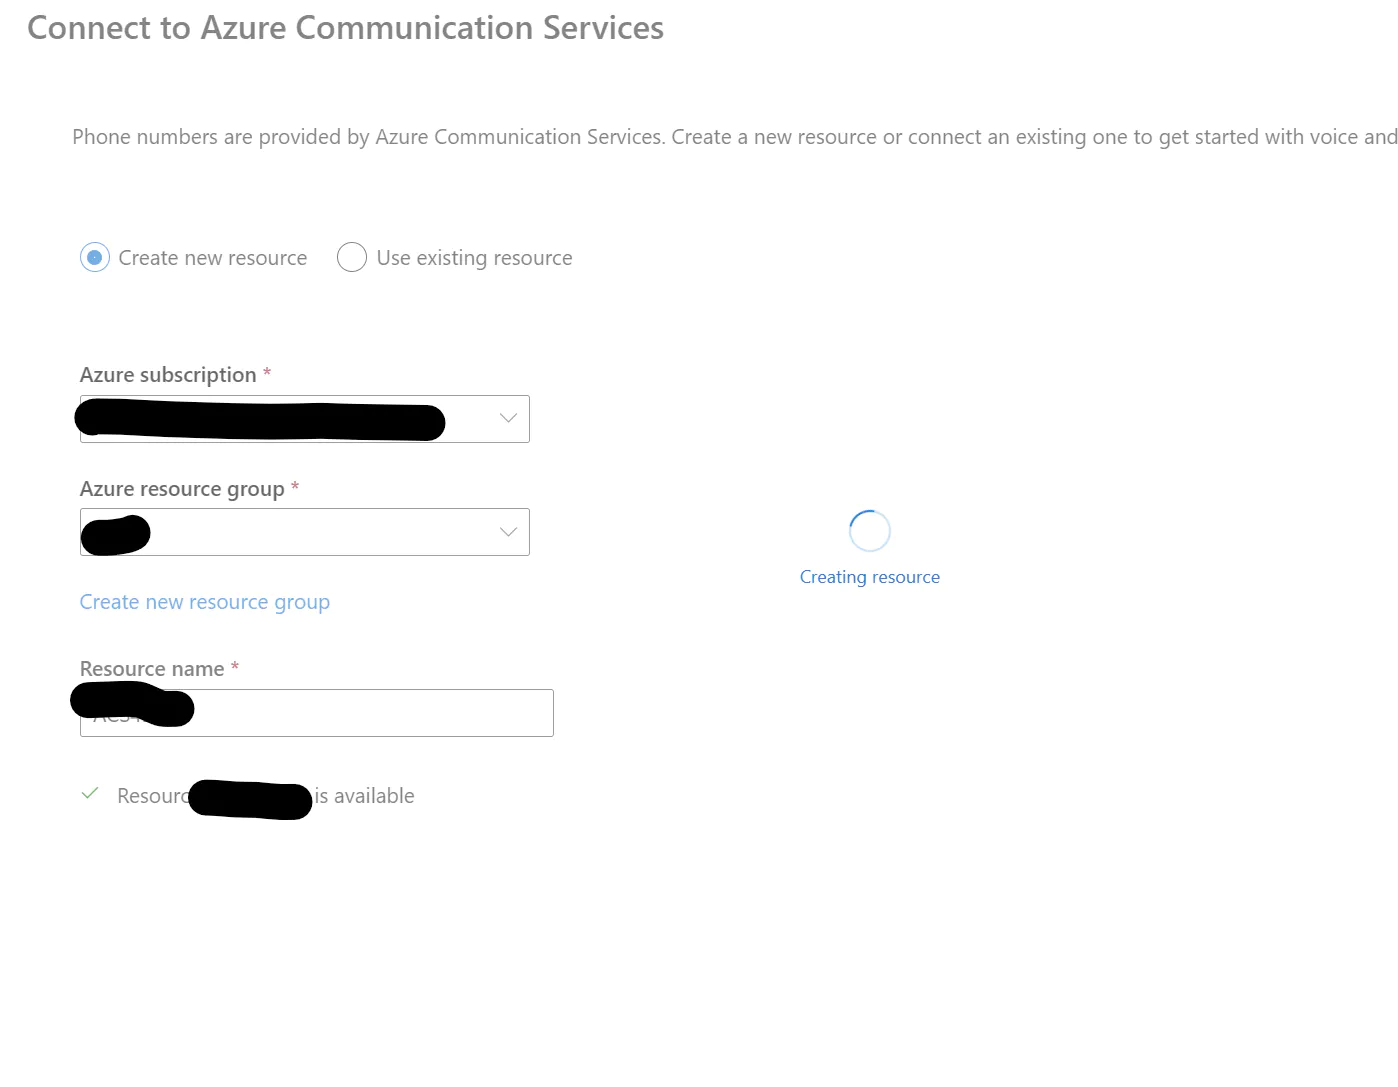
Figure 2: Create a new Resource
Leave the Omnichannel Admin Center window open, open another tab for the Azure Portal, and configure the SBC/Port for Direct Routing.
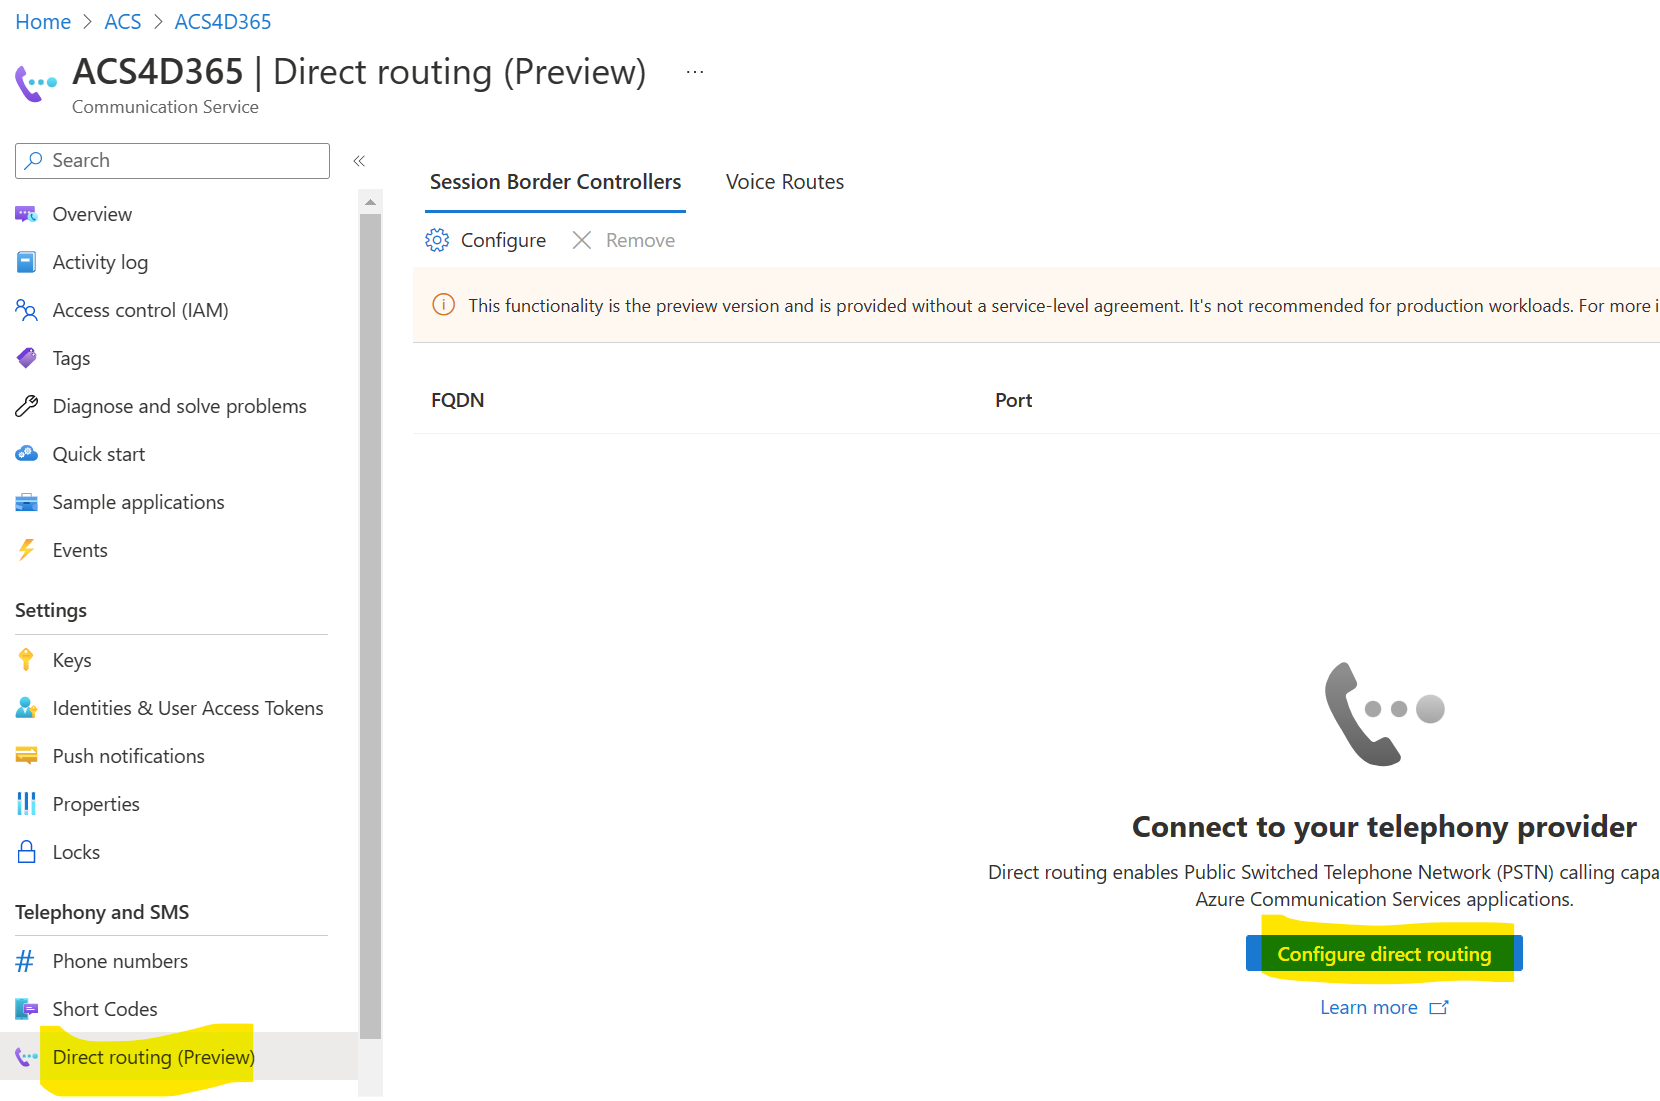
Figure 3: Create a new Session Border Controller Configuration
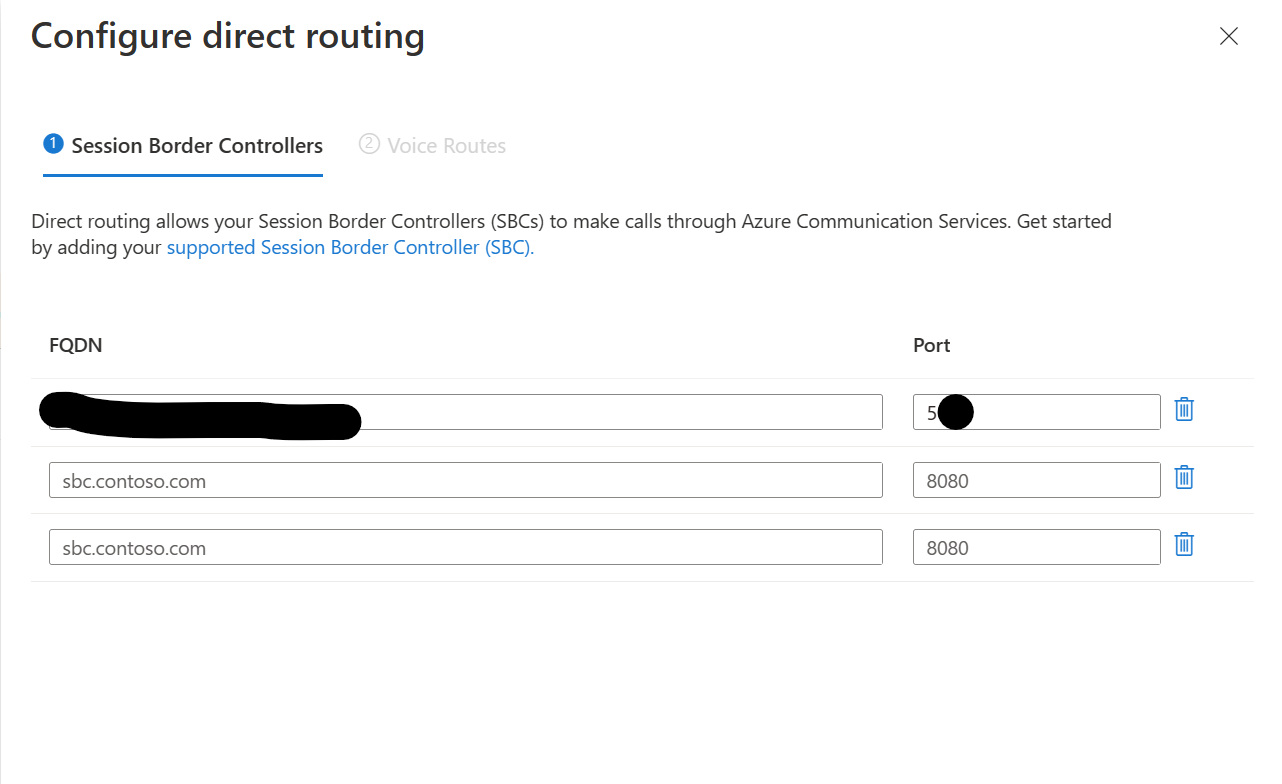
Figure 4: enter SBC FQDN and Port
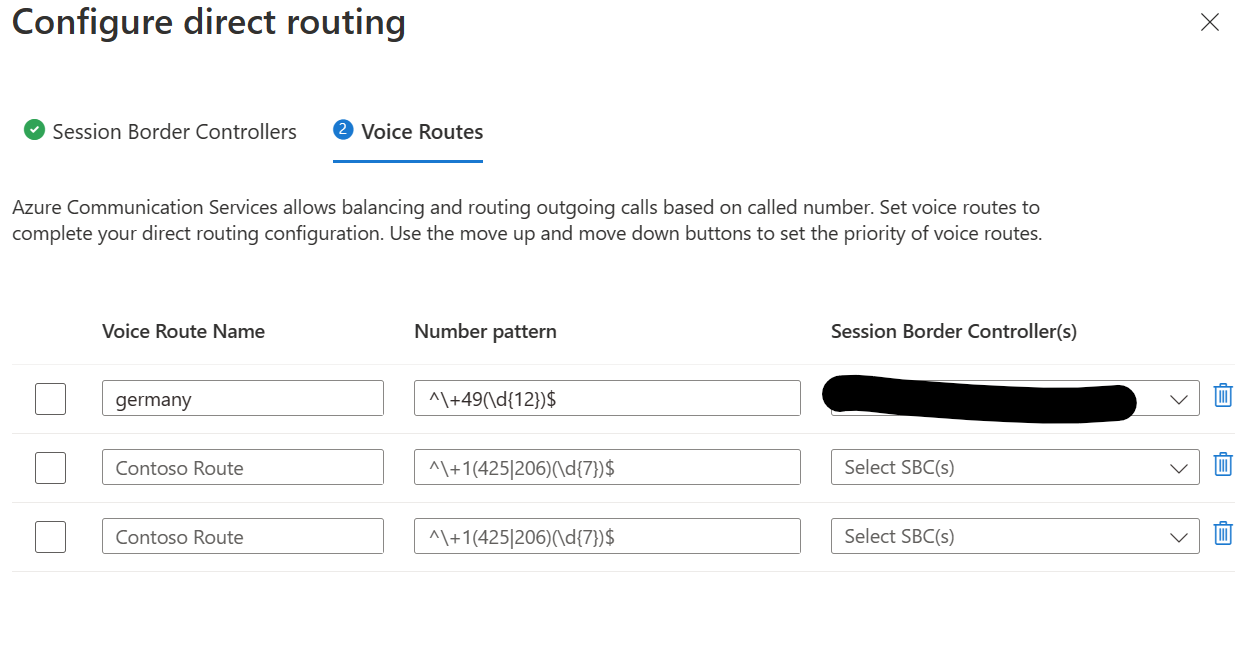
Figure 5: and a number pattern for outbound
Go back to your Omnichannel Admin Center tab and configure your phone numbers.

Figure 6: Add Phone Numbers - part 1
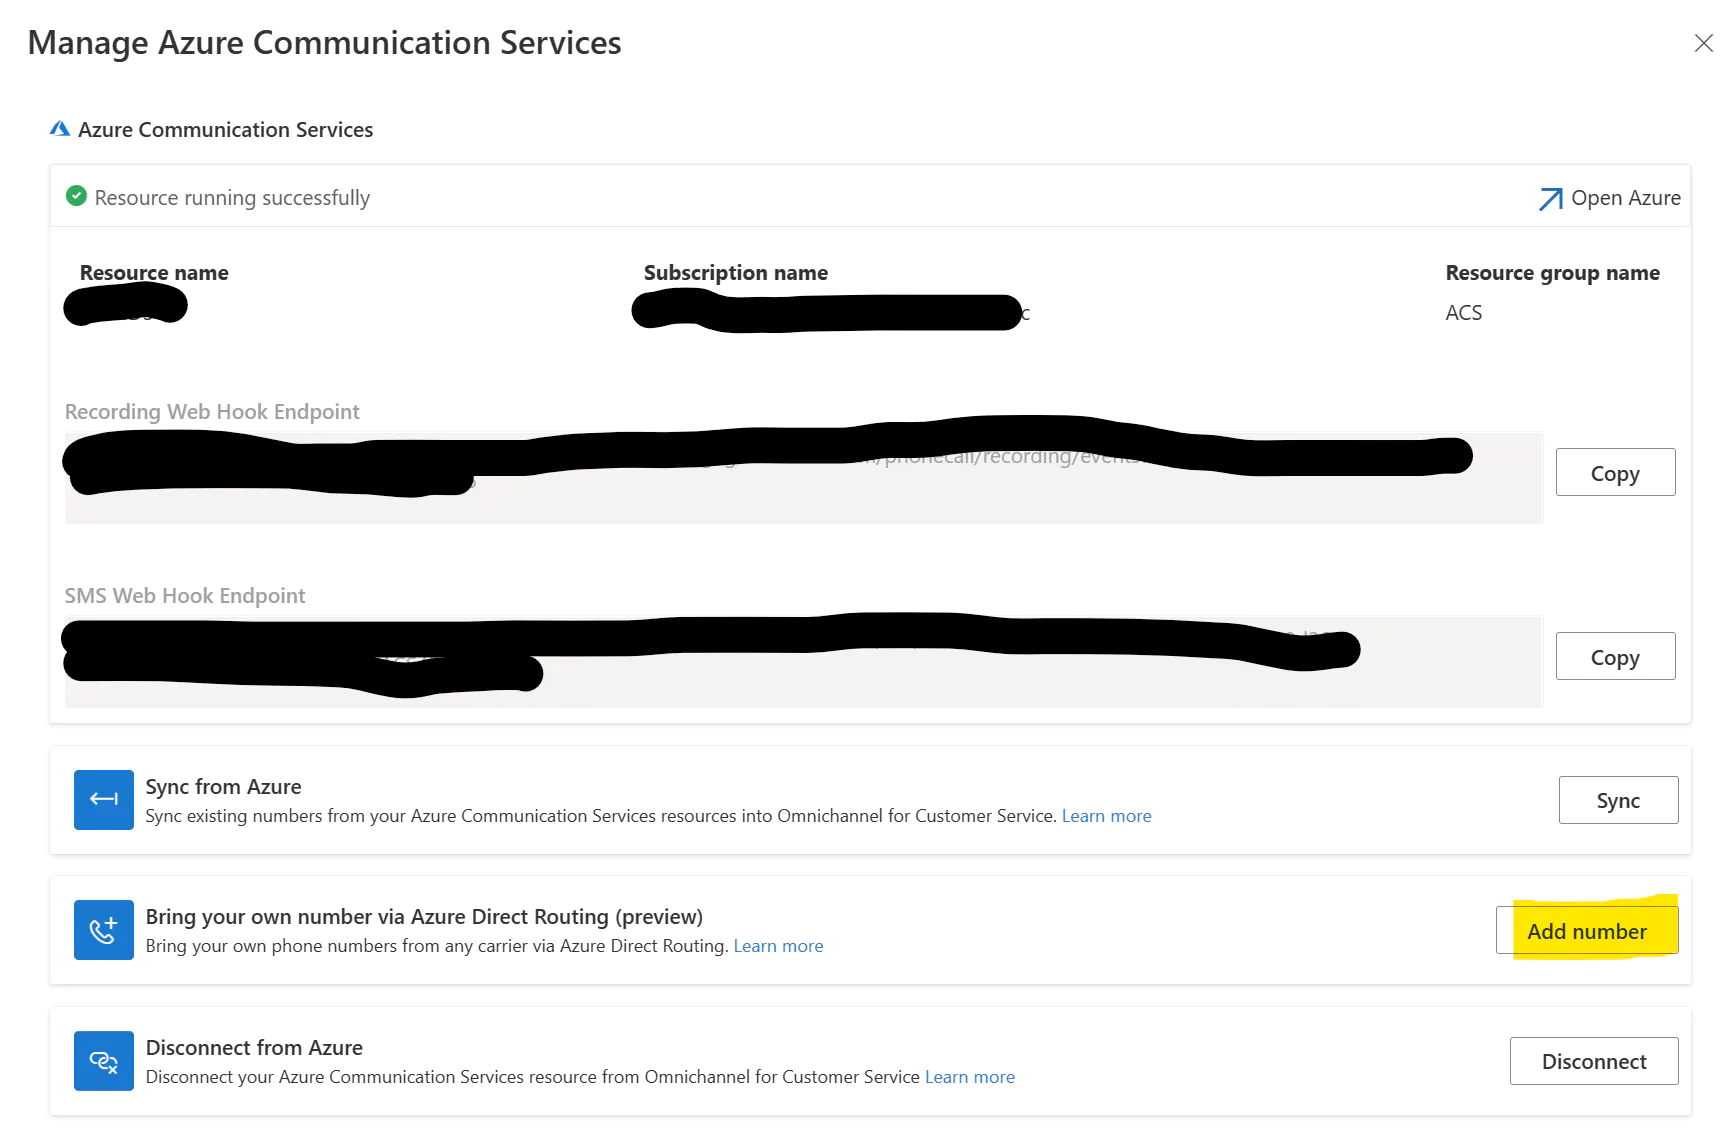
Figure 7: Add Phone Numbers - part 2
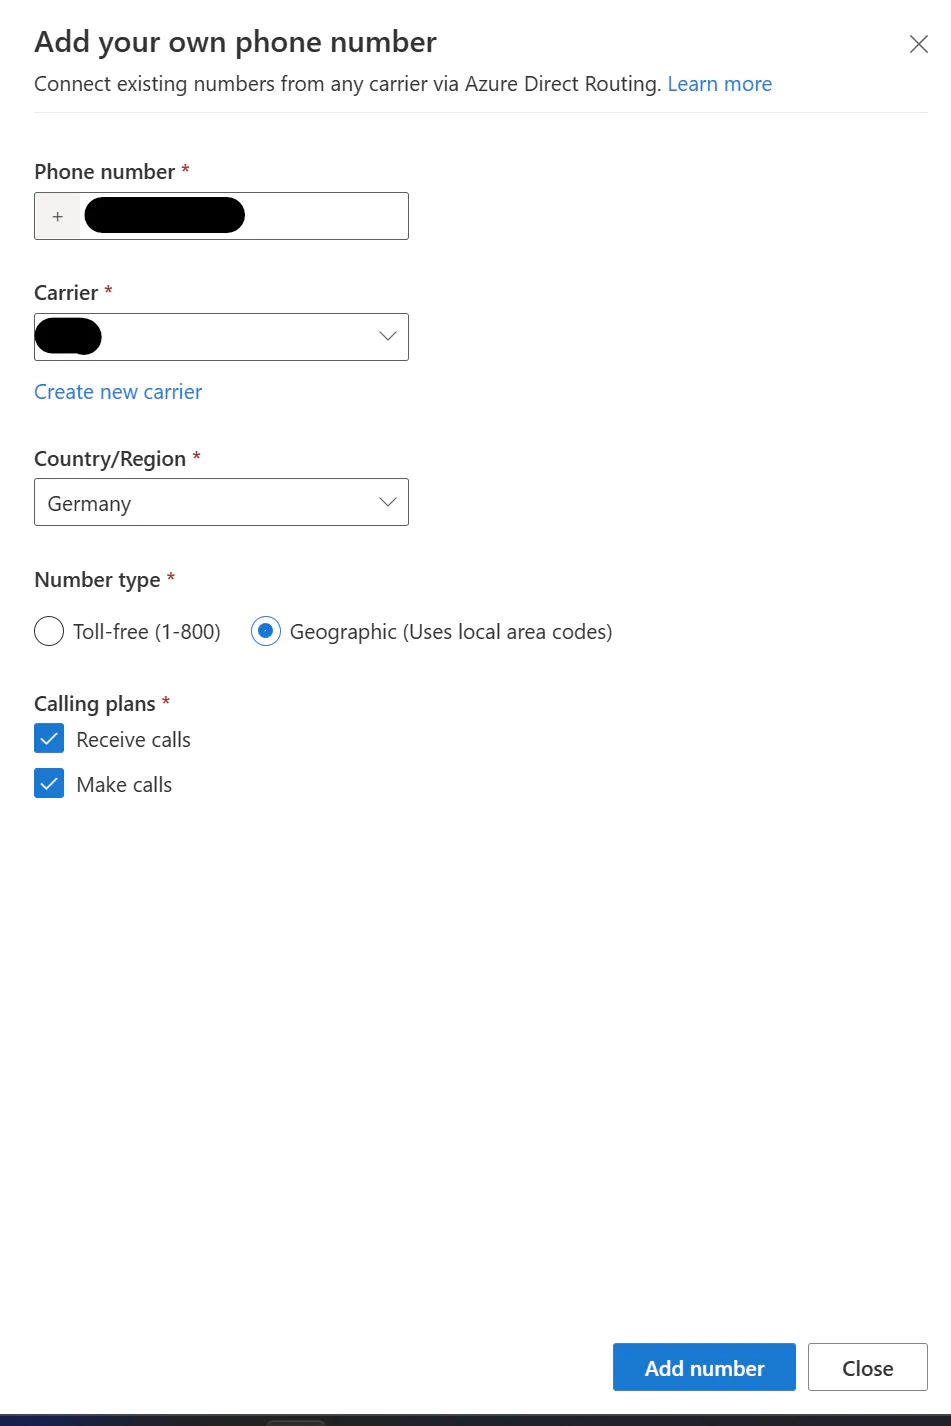
Figure 8: Add Phone Numbers - part 3
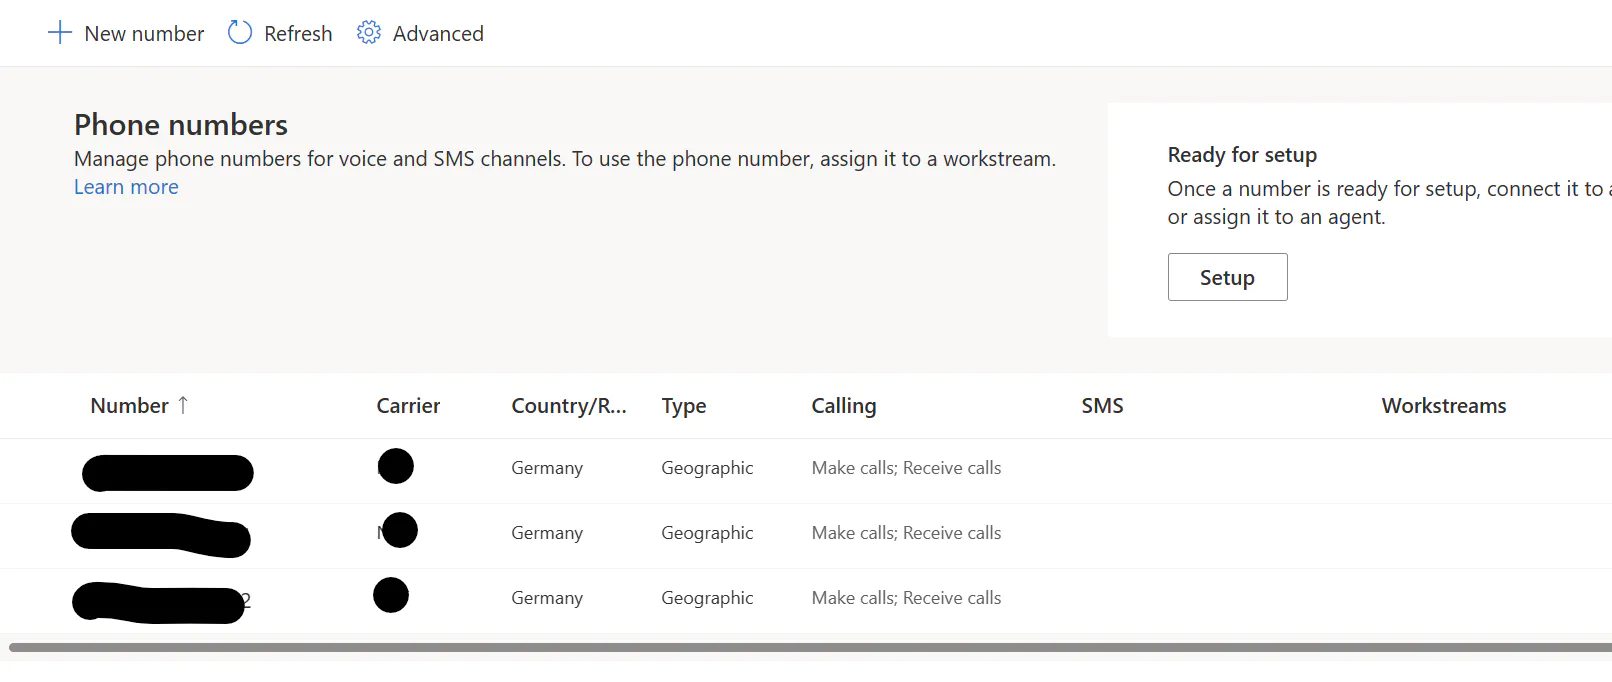
Figure 9: Add Phone Numbers - part 4
We will modify a queue and a workstream already in place for this Kickstarter.
Modify the “Demo voice call” workstream
Go to your Customer Service admin center, then to workstreams, and rename the workstream “Demo voice call workstream” to something more specific.
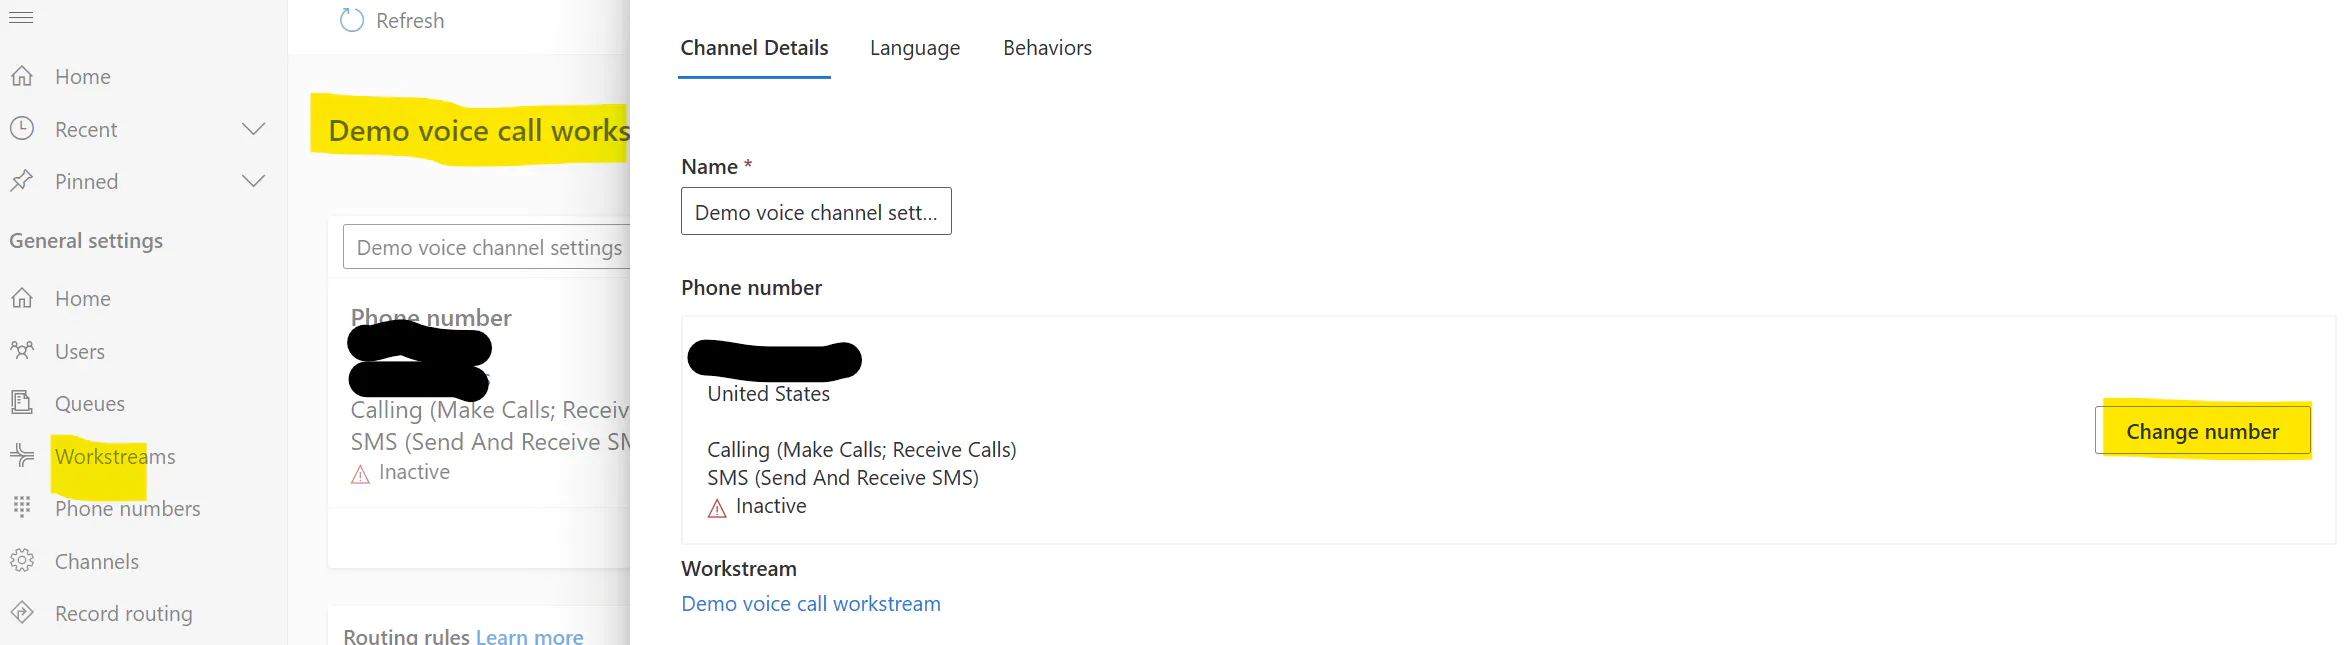
Figure 10: pick one of your fresh phone numbers
instead of agents, we add our bot, which we create in part 1
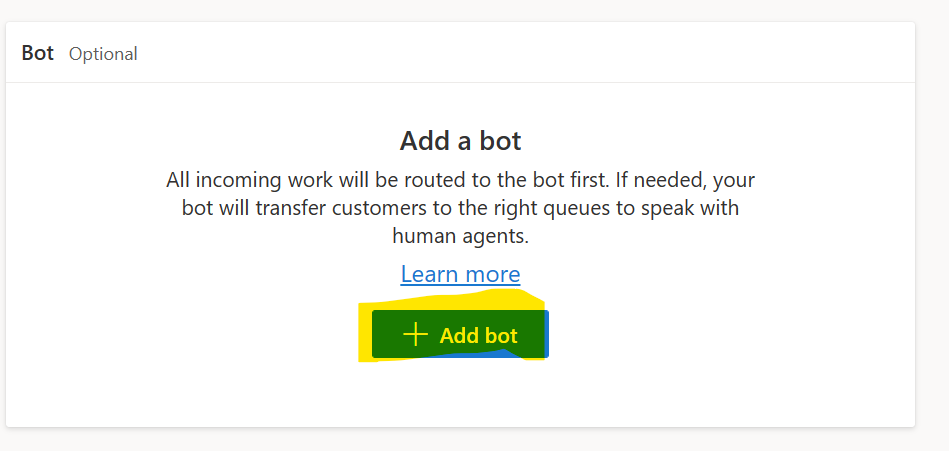
Figure 11: add your bot
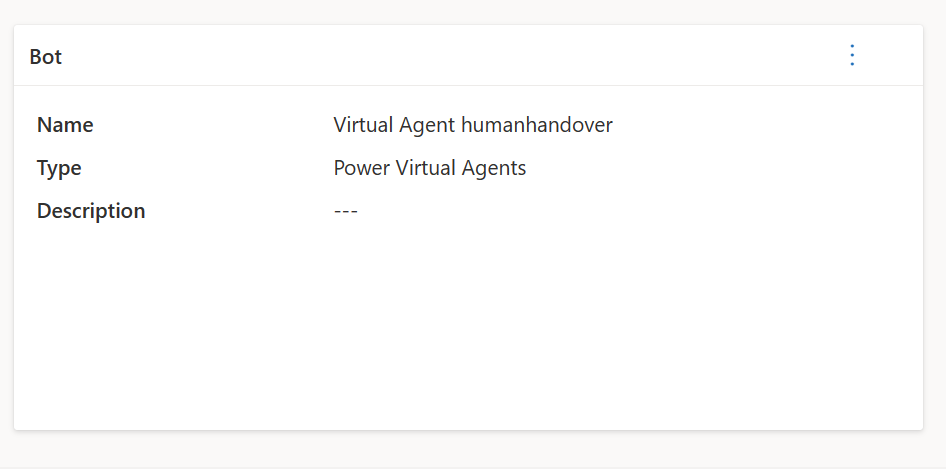
Figure 12: Bot configured
Modify your bot
By now, your bot is only able to transfer a call. This is the time to teach the bot something valuable; you could look at my “Create your first (voice-)bot” example to implement some QnA or processes.
Test the implementation
Take your phone and call the number you remembered from above.
You will land in a queue where the bot is the only agent.
Follow the dialog of your bot, now on the phone, and ask, “I want to talk to an agent”
The bot will transfer your call to a human agent, and you will see the incoming call on your agent dashboard.
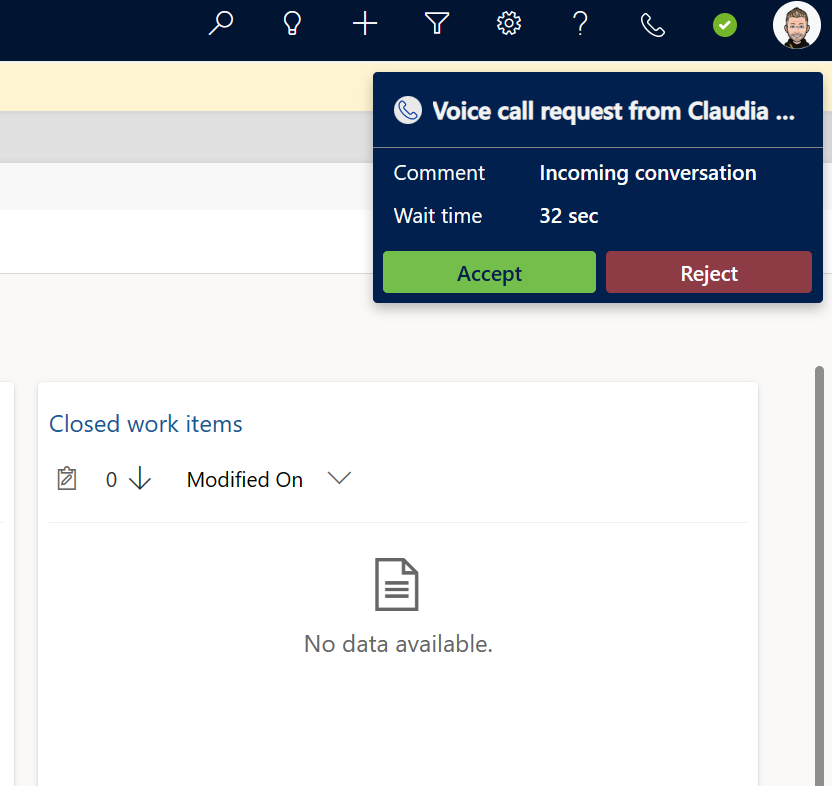
Figure 13: incoming call
Press Accept and see the complete agent experience.

Figure 14: Full Agent Desktop (Dashboard)
After taking the call, the agent can see the transcript of the dialog with the voice bot on the left and the standard Dynamics 365 Customer Service details on the right. Your customer was identified via Caller ID, and the correct Contact is shown here.
We have here recording and sentiment analysis enabled; the sentiment is shown on the top left as an emoticon.
Conclusion
We configured Dynamics 365 Customer Service and Power Virtual Agent as human-to-human and bot-to-human customer service solutions.
There is no need for a third-party solution to manage the phone call. Everything will be handled via Azure Communication Services and Dynamics 365 Customer Service.
Azure Communications services are billed based on your consumption, and there are no setup fees.
Start the conversation