

Table of Contents
Extend Power Virtual Agent with Azure Cognitive Services
Power Virtual Agent (PVA) is getting better and better from Release to Release, but there are situations where you want to use Azure Services to improve your user’s experience.
Why not combine Azure Cognitive Services for Language with PVA to add missing elements?
Imagine serving your customers and employees immediately in their native language without extra effort and without investing time in translating and maintaining your QnA in other languages.
Imagine there is no need for additional resources, but your customers and employees will feel more directly addressed.
Imagine your employees can refocus on delivering value to your customers instead of being a voice interface of a QnA collection. Microsoft Power Virtual Agents are perfect for automating customer service, and when combined with Azure Cognitive Services, they are almost infinitely extensible.
How easy is that?
A simple Power Automate flow helps your Power Virtual Agent serve your customers in over ninety languages.
PVA has a built-in topic that can serve as a hook to the outside world, the “Fallback” system topic.
Activate the “Fallback” topic
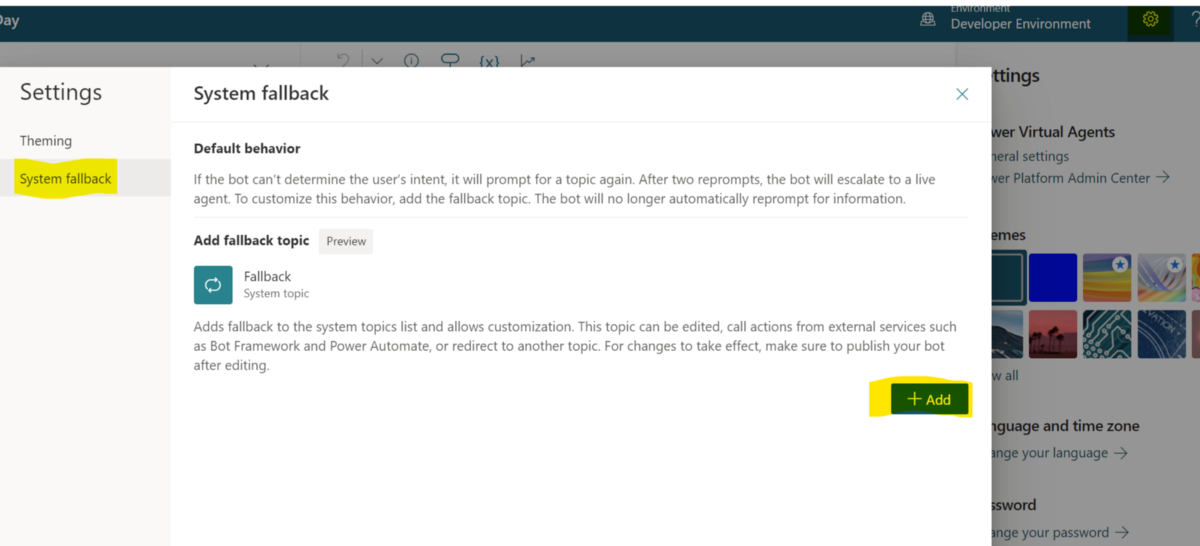
Figure 2: Activate the “Fallback” topic
To activate the “Fallback” system topic, go to Settings within the editing canvas (click on the cog symbol), then System fallback, and then “+Add”.
After activating the topic, you will find it within “topics”.
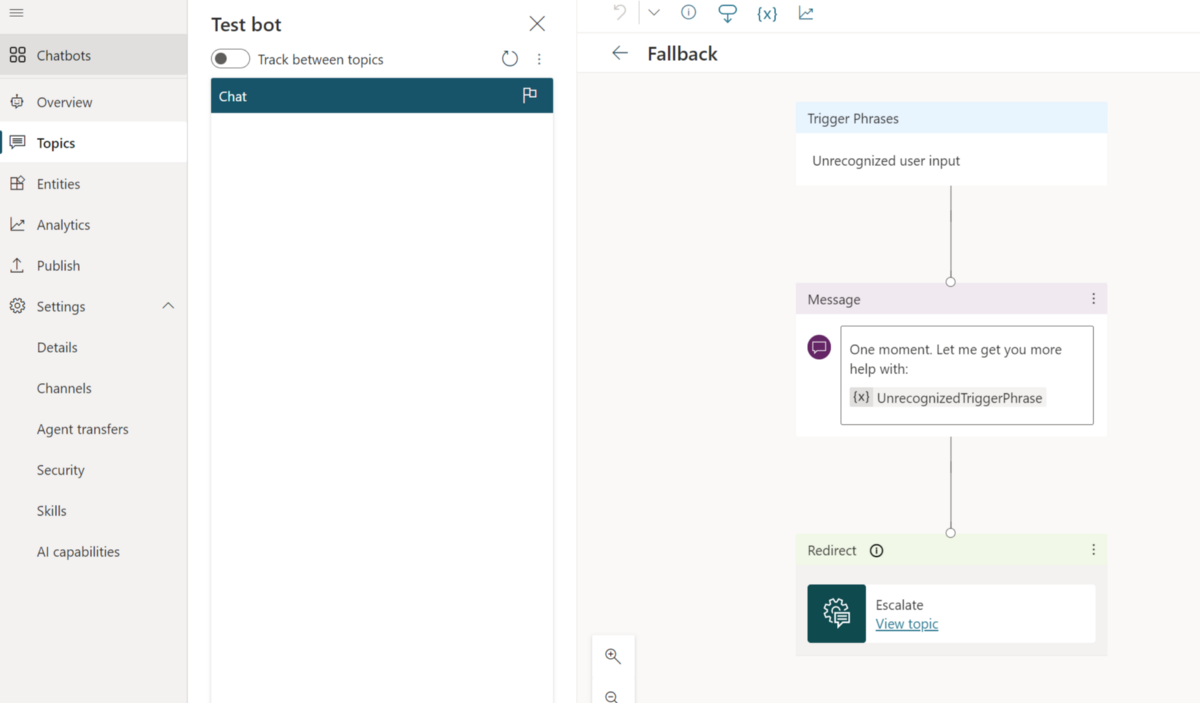
Figure 3: activated fallback topic
The “Fallback” topic is ready to connect with the outside world, as everything not recognized by our already in-place topics will end up here as “unrecognized user input”.
Extend Power Virtual Agent to a multilingual QnA Resolver
If you have no PVA bot handy, try my “Power Virtual Agent in a Day” Example as a starter.
This example will integrate a FAQ Database on “growing chilies”. Data from a random web page, “Greenhouse Garden Shop - Growing Chillies FAQ will be used.
I´m not related to this shop but let´s respect their knowledge of growing chilies and use their questions and answers here!!
Following my slogan:
“Sriracha on everything!”
Chilies are the main ingredient of Sriracha. :)
Custom question answering
We created a new project on Azure Language Studio and chose “Custom Question Answering”.

Figure 4: Create a new Custom Question Answering Project
-
Choose the option “I want to set the language for all projects created in this resource”; select English; Select Next.
-
Enter a project name, “PVAinaDay-CQA”, a description, and leave the default answer with a setting of “No answer found”.
-
Review your choices and select Create project
-
From the Manage sources page, select Add source > URLs. Select Add URL, enter the following values, and then select Add all:
| URL Name | URL |
|---|---|
| Growing Chillies | https://www.greenhousesensation.co.uk/growing-chillies-faq/ |
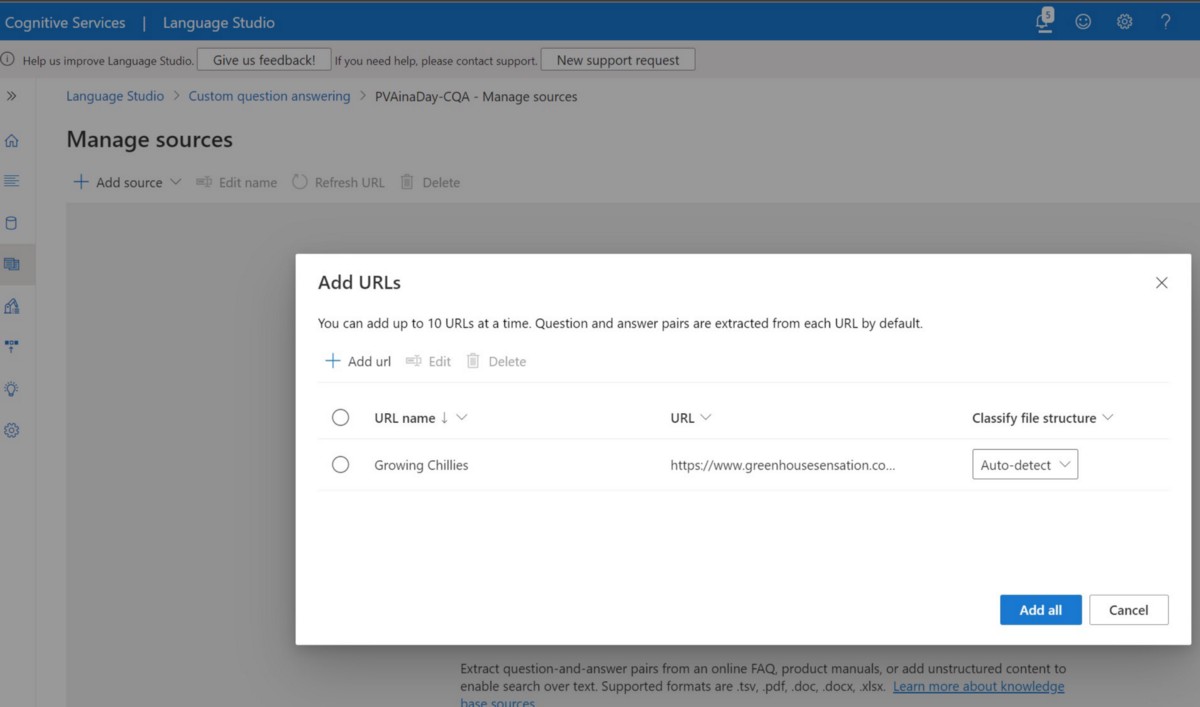
Figure 5: Add URL of FAQs
Language Studio will now import your FAQs into the project and gives you single and multiturn Question and Answer pairs.

Figure 6: Question and Answer pairs in Knowledge Base
To use the imported content, we need to clean up the answers and make them usable for a bot. We must remove pictures and links if our bot is a voice bot.
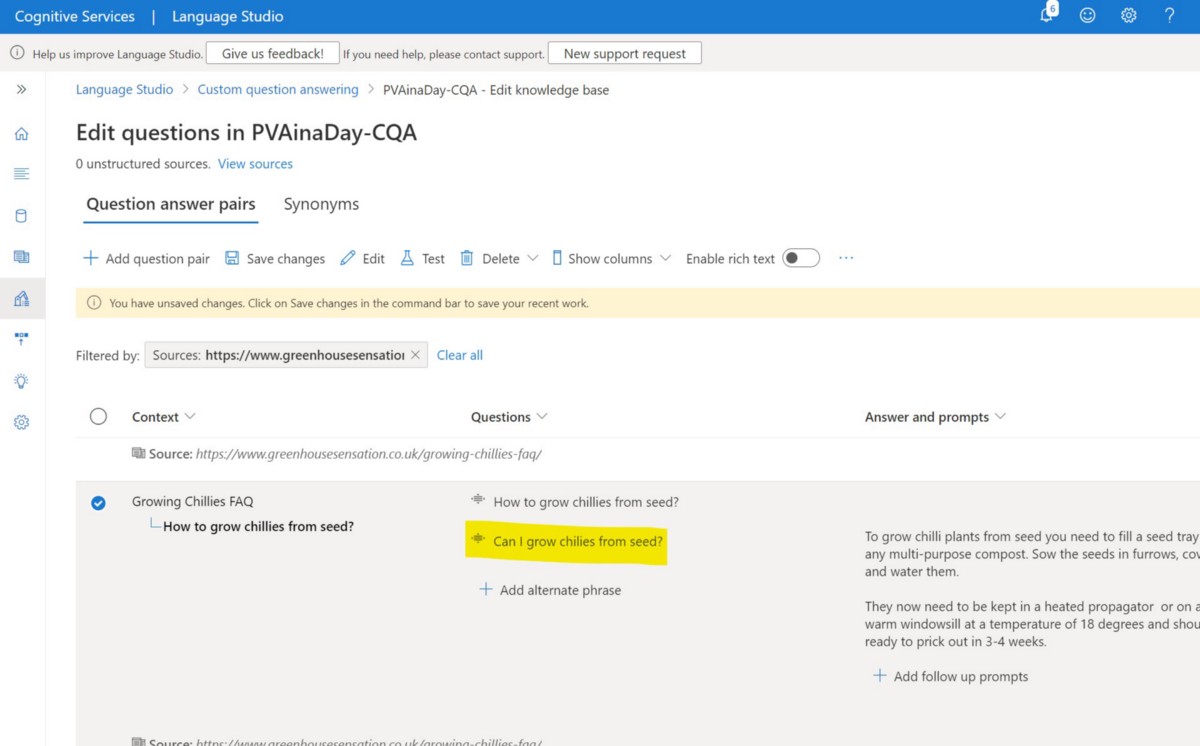
Figure 7: Add alternate phrases
To make the Answering more fluent, we will add variations to each question.
And deploy the knowledge base.
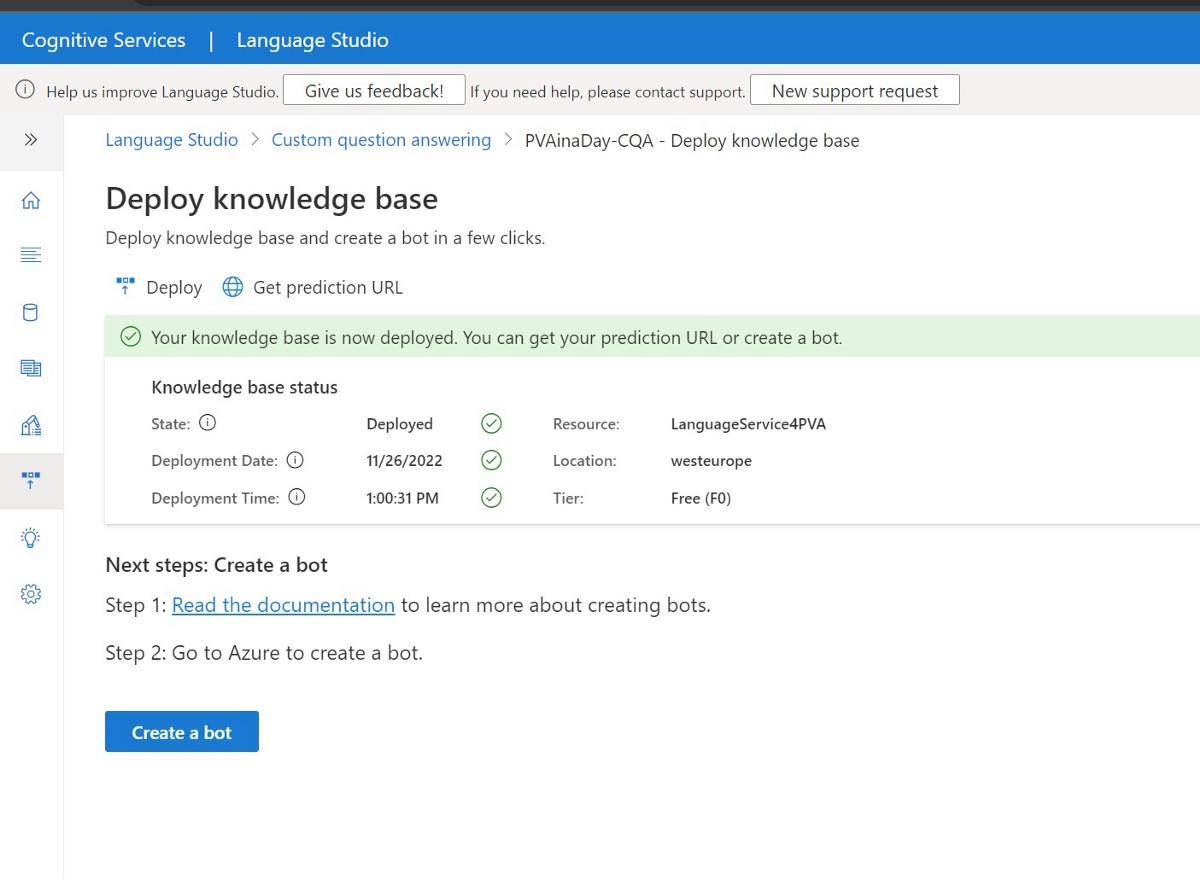
Figure 8: Select “Deploy” on the left side and press “deploy” on top to deploy
After deploying the knowledge base, we press “Get prediction URL”, and we note down the Site URL(Red) and the Account Key (Yellow); we will use both later in Power Automate.
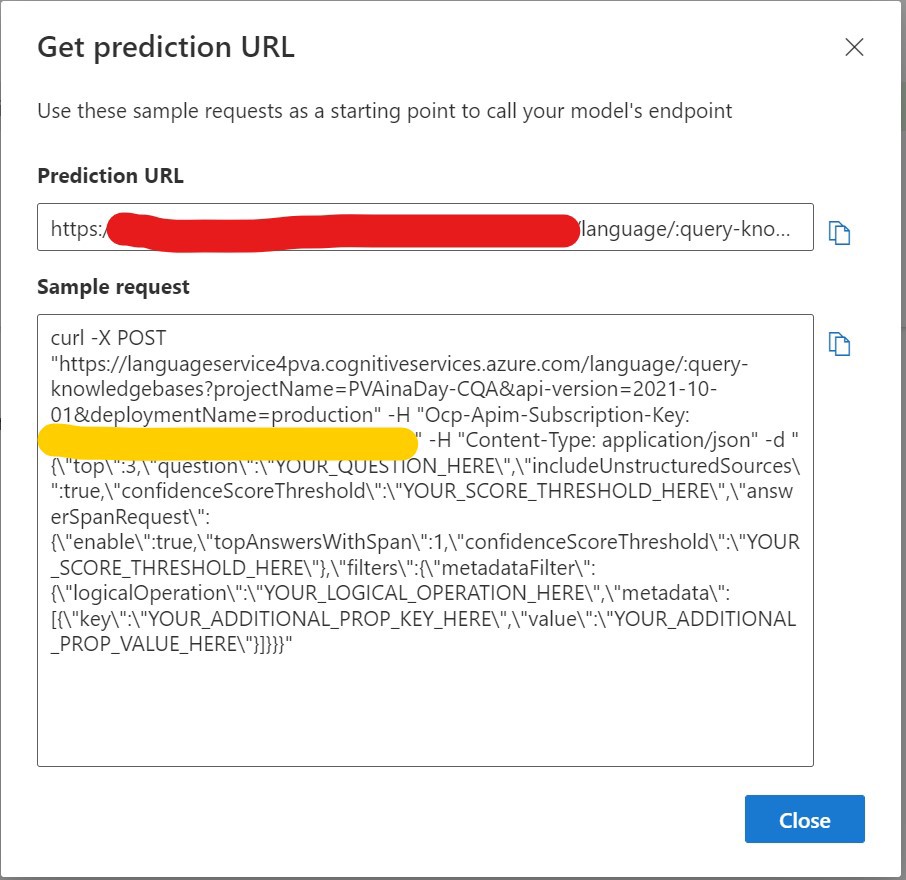
Figure 9: Retrieve the Site URL and Account Key
Integrate Custom Question Answering and Microsoft Translator into Power Virtual Agent via Power Automate
We jump back into your newly created “Fallback” Topic and remove the “Escalate” and the “Message” node.
After deleting the nodes, we create a new “Call an action” node.
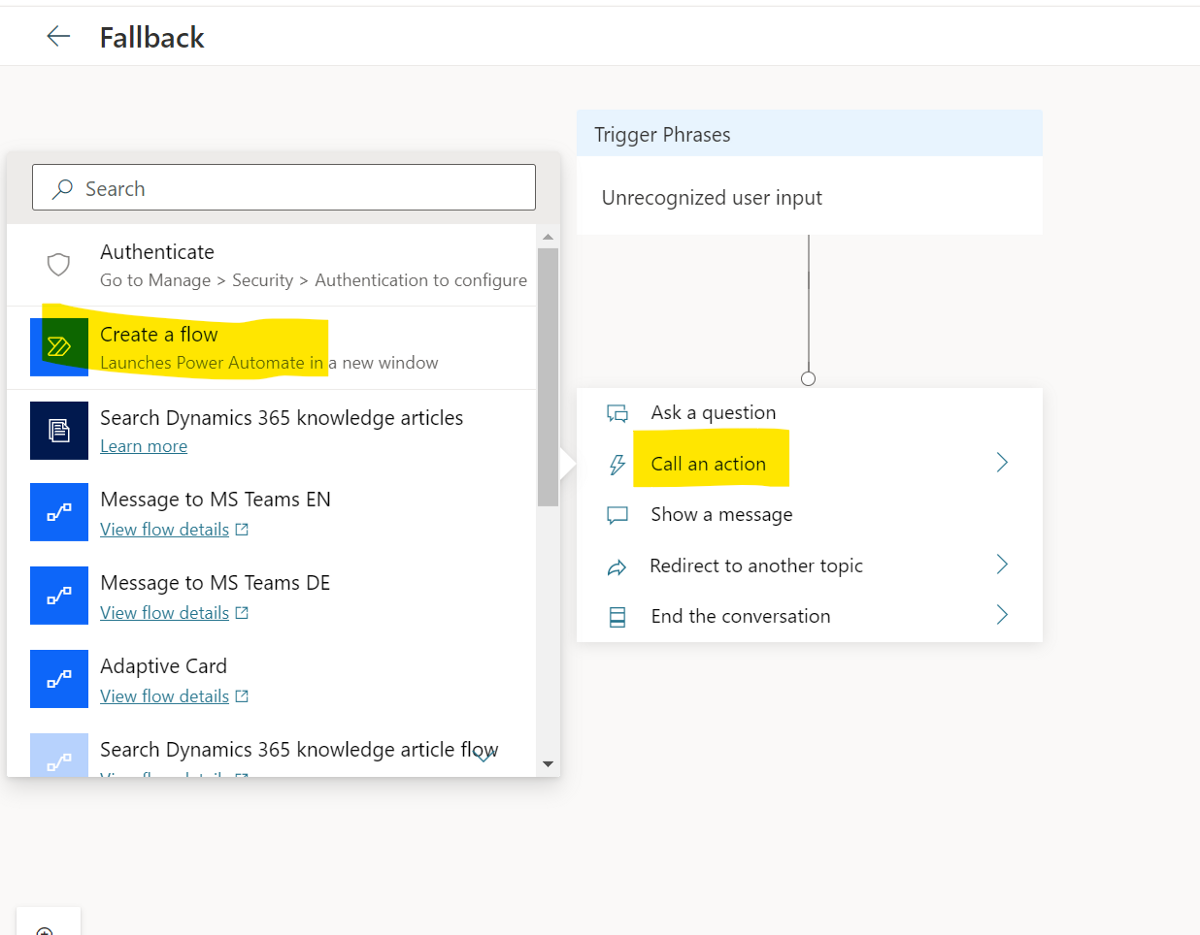
Figure 10: Create a new Call for an action node
Power Automate will open, and we can create a new flow.
First, we rename the flow and define the input.
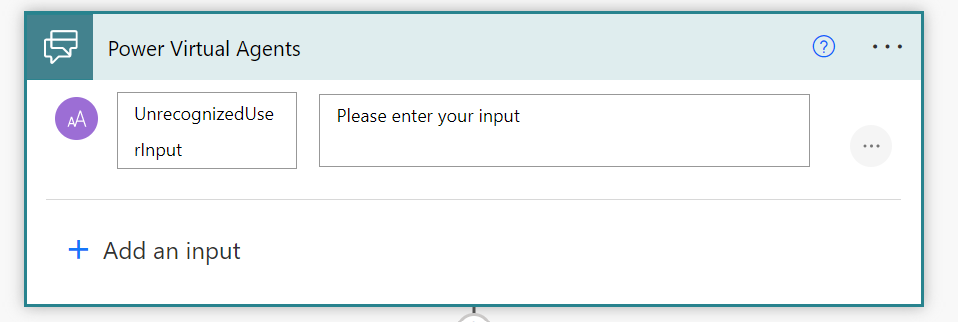
Figure 11: Define Input
To determine the language of the question, we will initialize a new variable, “QuestionLanguage”. We will use it to store the language code.
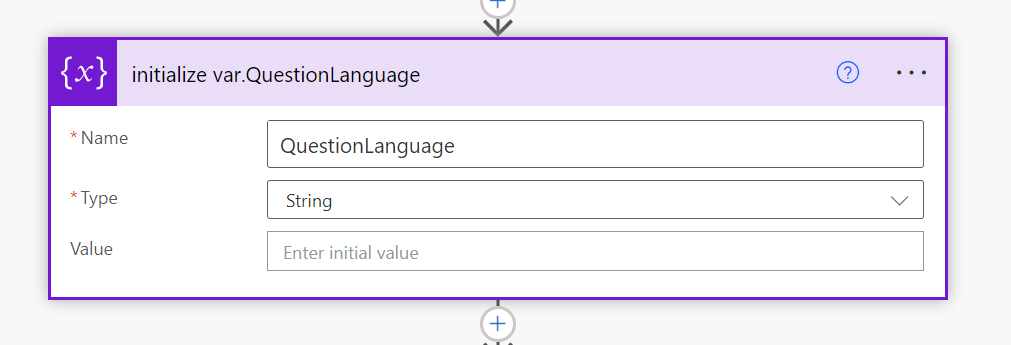
Figure 12: Initialize variable
Create a new node by searching “Microsoft Translator V2” and selecting “Detect language”, and set Text to the content of the variable “UnrecognisedUserInput”.
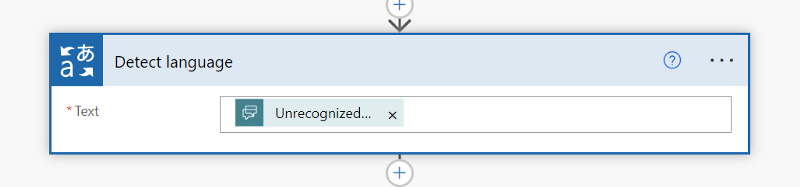
Figure 13: Create Detect Language Node
We use a set Variable Node to store the output of “detect language” into the “QuestionLanguage” Variable
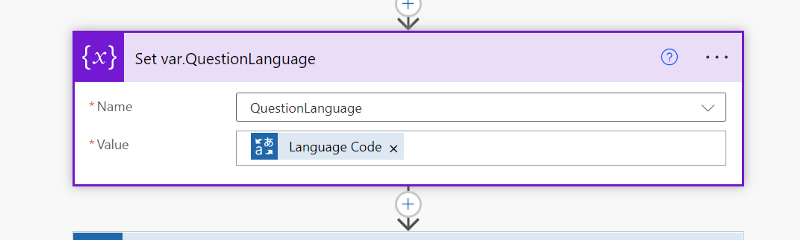
Figure 14: Initialize Variable QuestionLanguage
with a translate text node (Microsoft Translator V2); we translate the content of “UnrecognizedUserInput” to English.
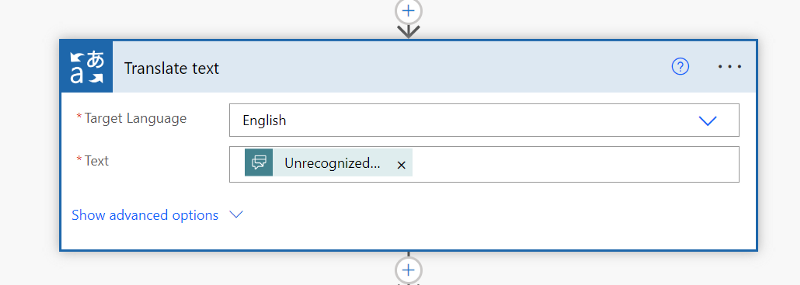
Figure 15: Translate to English
Create a new node by searching “Language - Question Answering” and selecting “Generate answer from Project”.
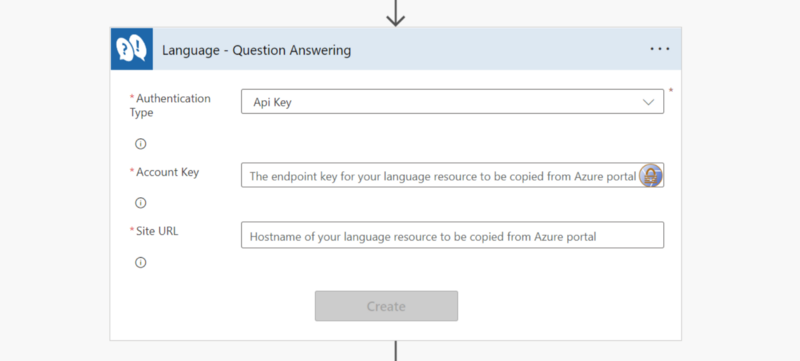
Figure 16: Create Node
We noted the account Key and Site URL earlier in this guide; we use the values now.
Set “Question” to the output of the translation node.
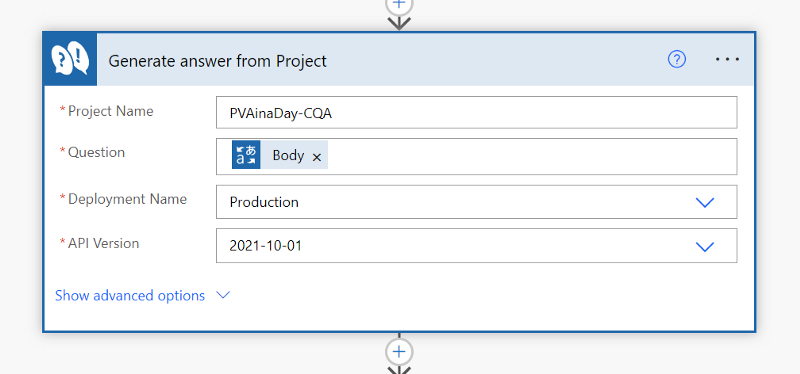
Figure 17: Generate Answers from Project
Next, Initialize a new variable with a name, e.g., “CQA_Answer”
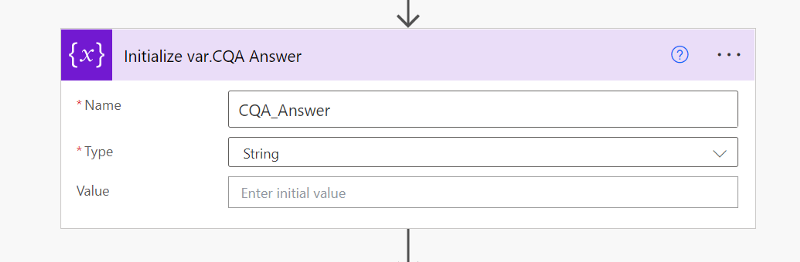
Figure 18: Initialize Variable CQA_Answer
A “Apply to each” Node with a “Translation” and a “set Variable” action will translate back to the language the question was asked in.
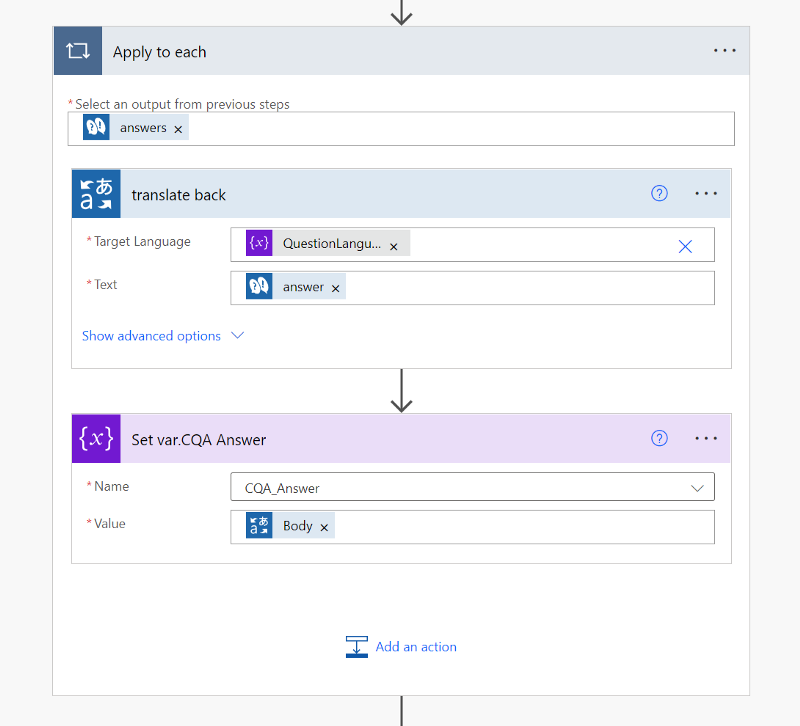
Figure 19: Apply to each Node with two actions
Finally, we adjust the Return Value to the content of the “CQA_Answer” Variable.
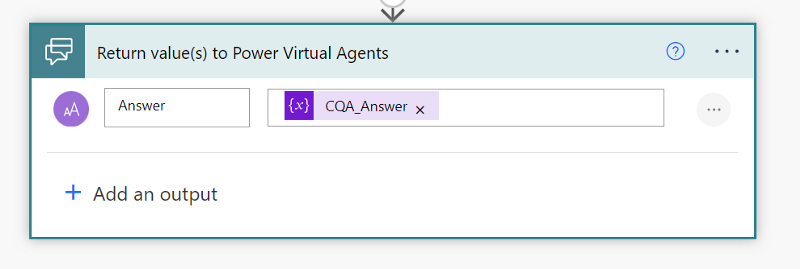
Figure 20: Return Value with Content of CQA_Answer Variable
After saving the flow, we can select the flow in the action node, adjust the input, and create a message node to display the output of the flow.
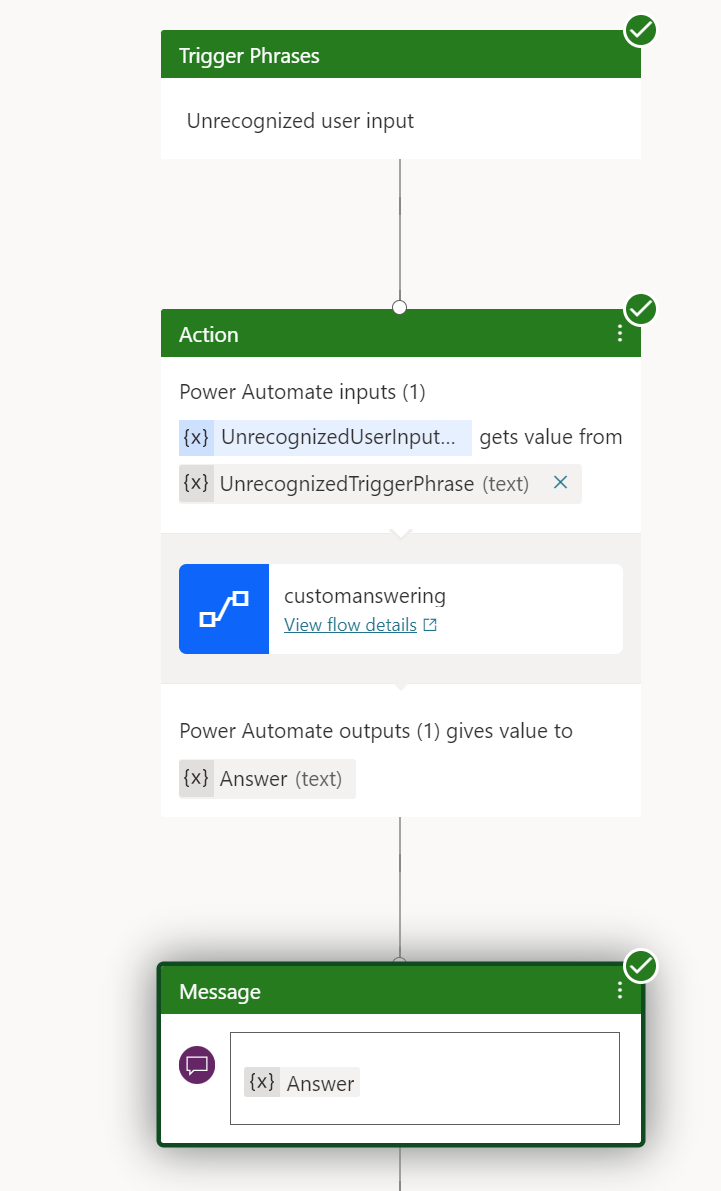
Figure 21: Complete Topic with Power Automate Flow
The flow will result in the following:
A question asked to the bot without a topic in PVA will end up in the “Fallback” topic. Custom Question Answering will help with the answer, even to a question not asked in English.
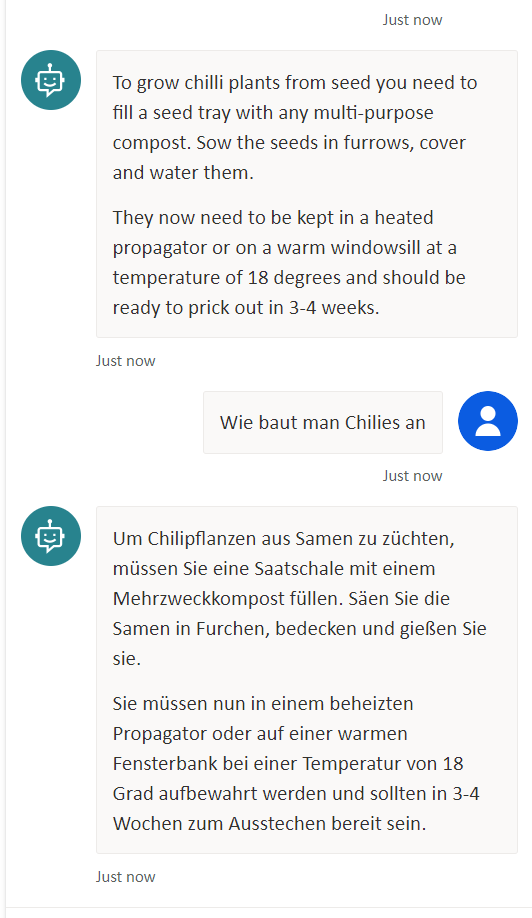
Figure 22: Result: multilingual QNA
Additional Information
-
Custom Question Answering - documentation [successor of QnA Maker]
-
Conversational Language Understanding - if you would like to make the next step - documentation [successor of LUIS]
-
Power Automate Connectors - documentation
Start the conversation