

%20-%20Incorporating%20your%20own%20data%20to%20create%20unique%20experiences)
Table of Contents
second part of a series
part 1 (the basics and installing the gui) of the series was publish a week earlier
Motivation
In this second part of the series, we will learn how to customize our chatGPT clone with our own data using Azure OpenAI Service (AOAI) and some Azure services. We will use Azure Blob Storage to store our data, Azure Cognitive Search to index and query it, and Azure Search Index to fine-tune our GPT model. This way, we can make our chatbot more relevant and personalized for our users.
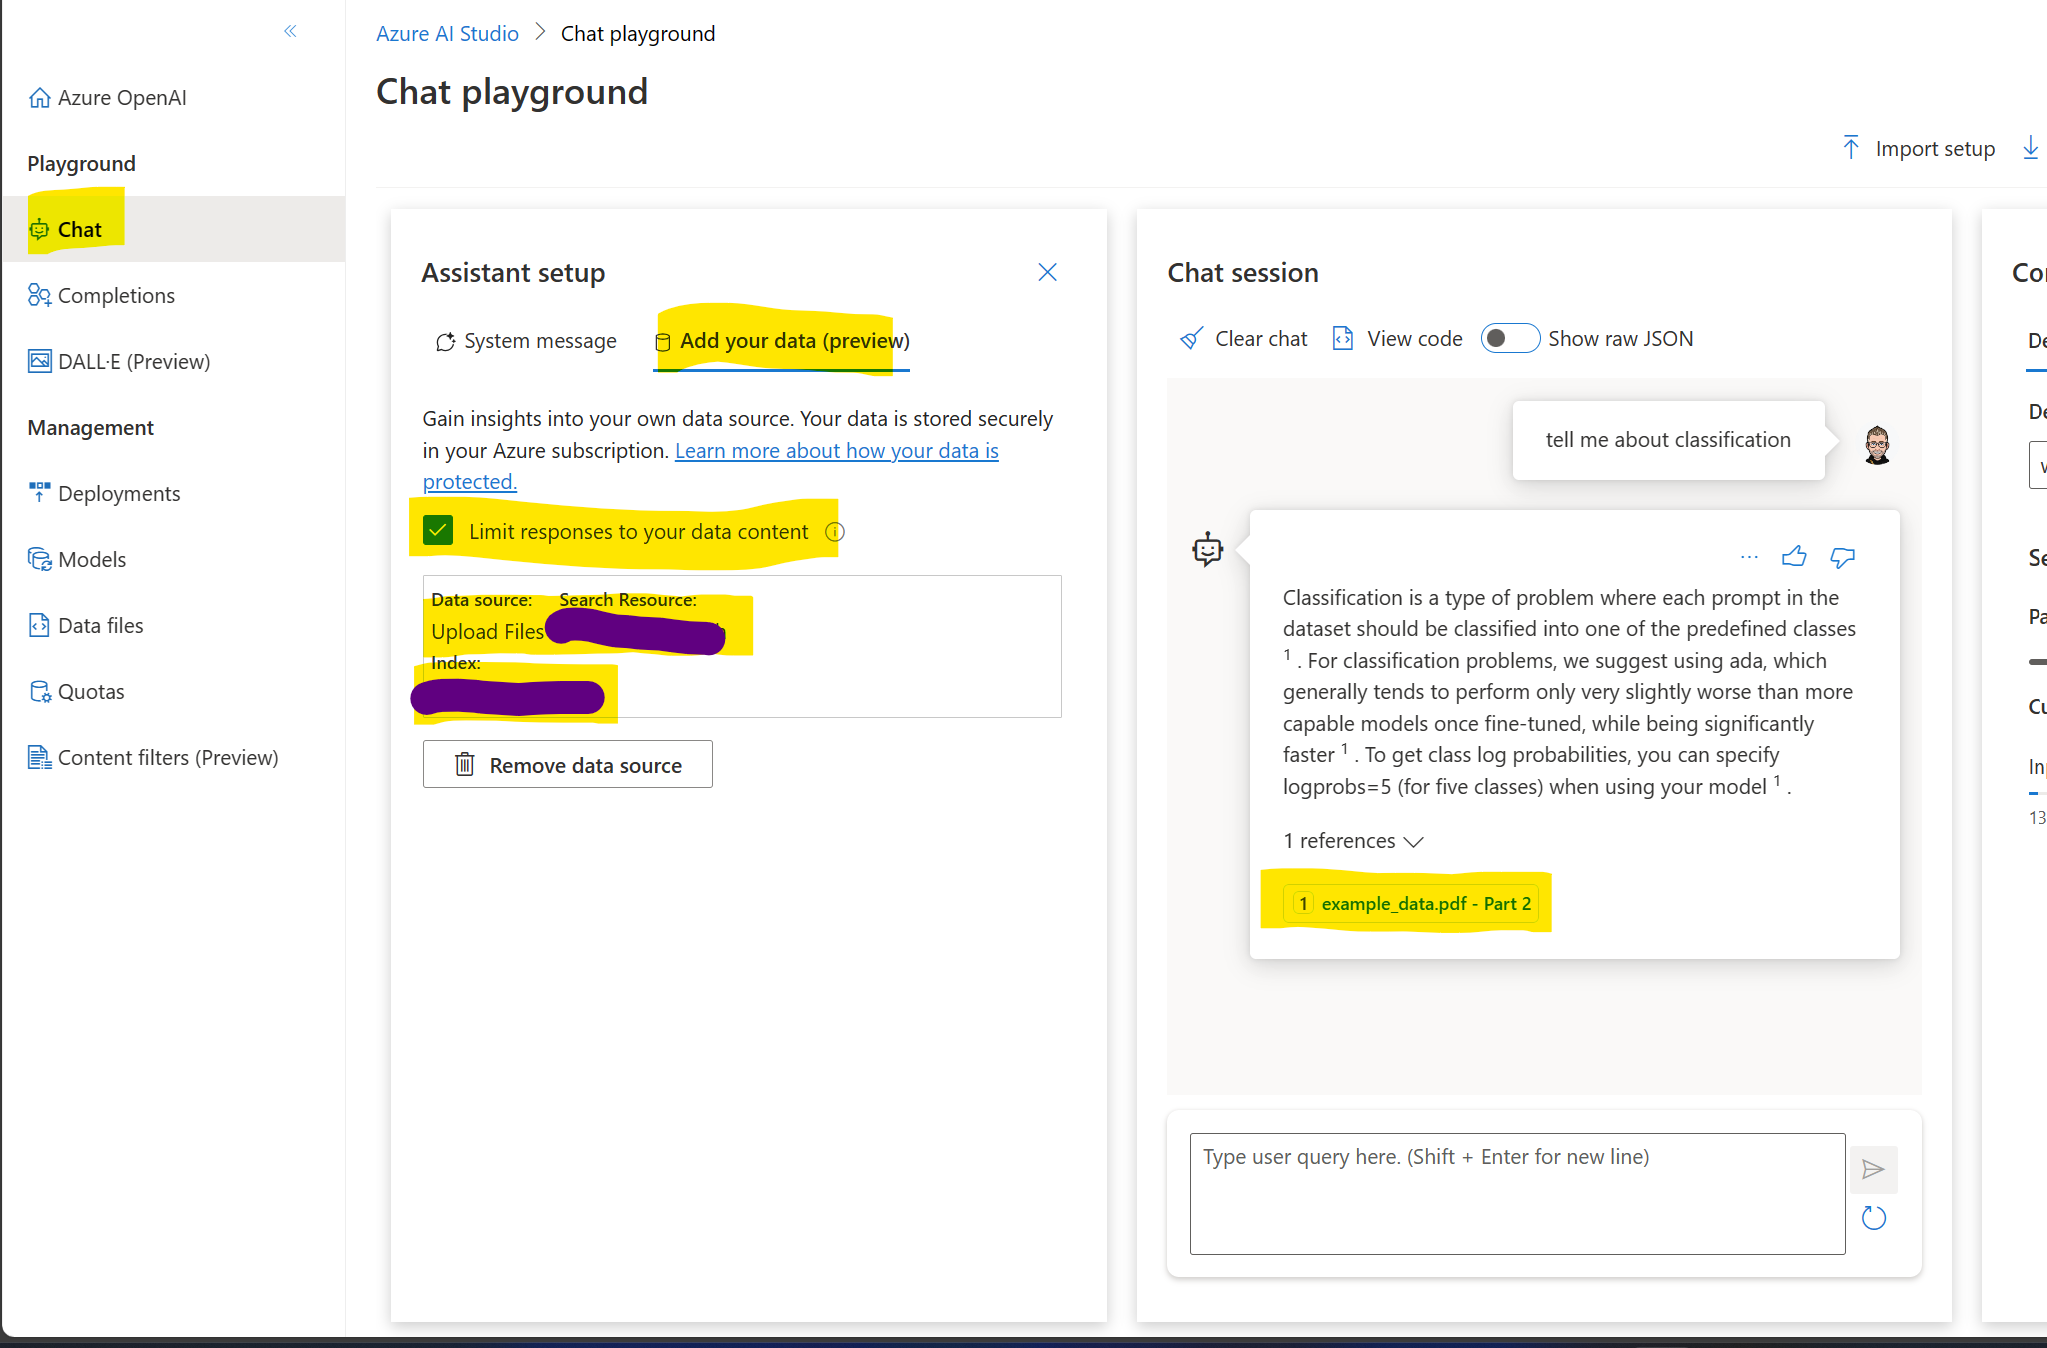
Add your data the easy way
-
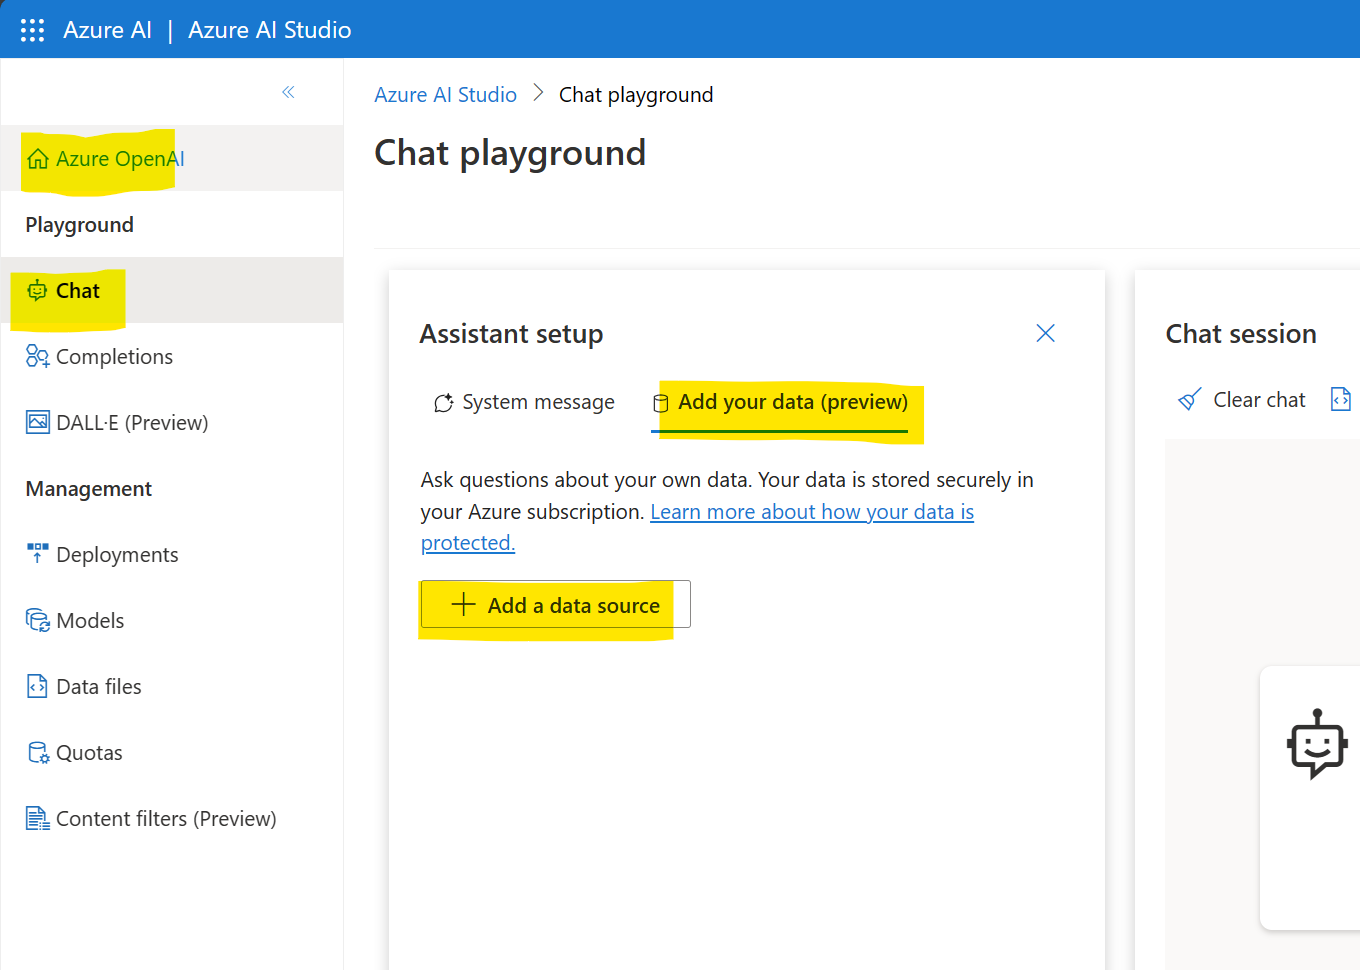
Go to Azure OpenAI Studio, head over to the playground, and choose Chat
-
Click on the Assistant Setups entry “Add your Data”
-
Click on “Add a data source”
-
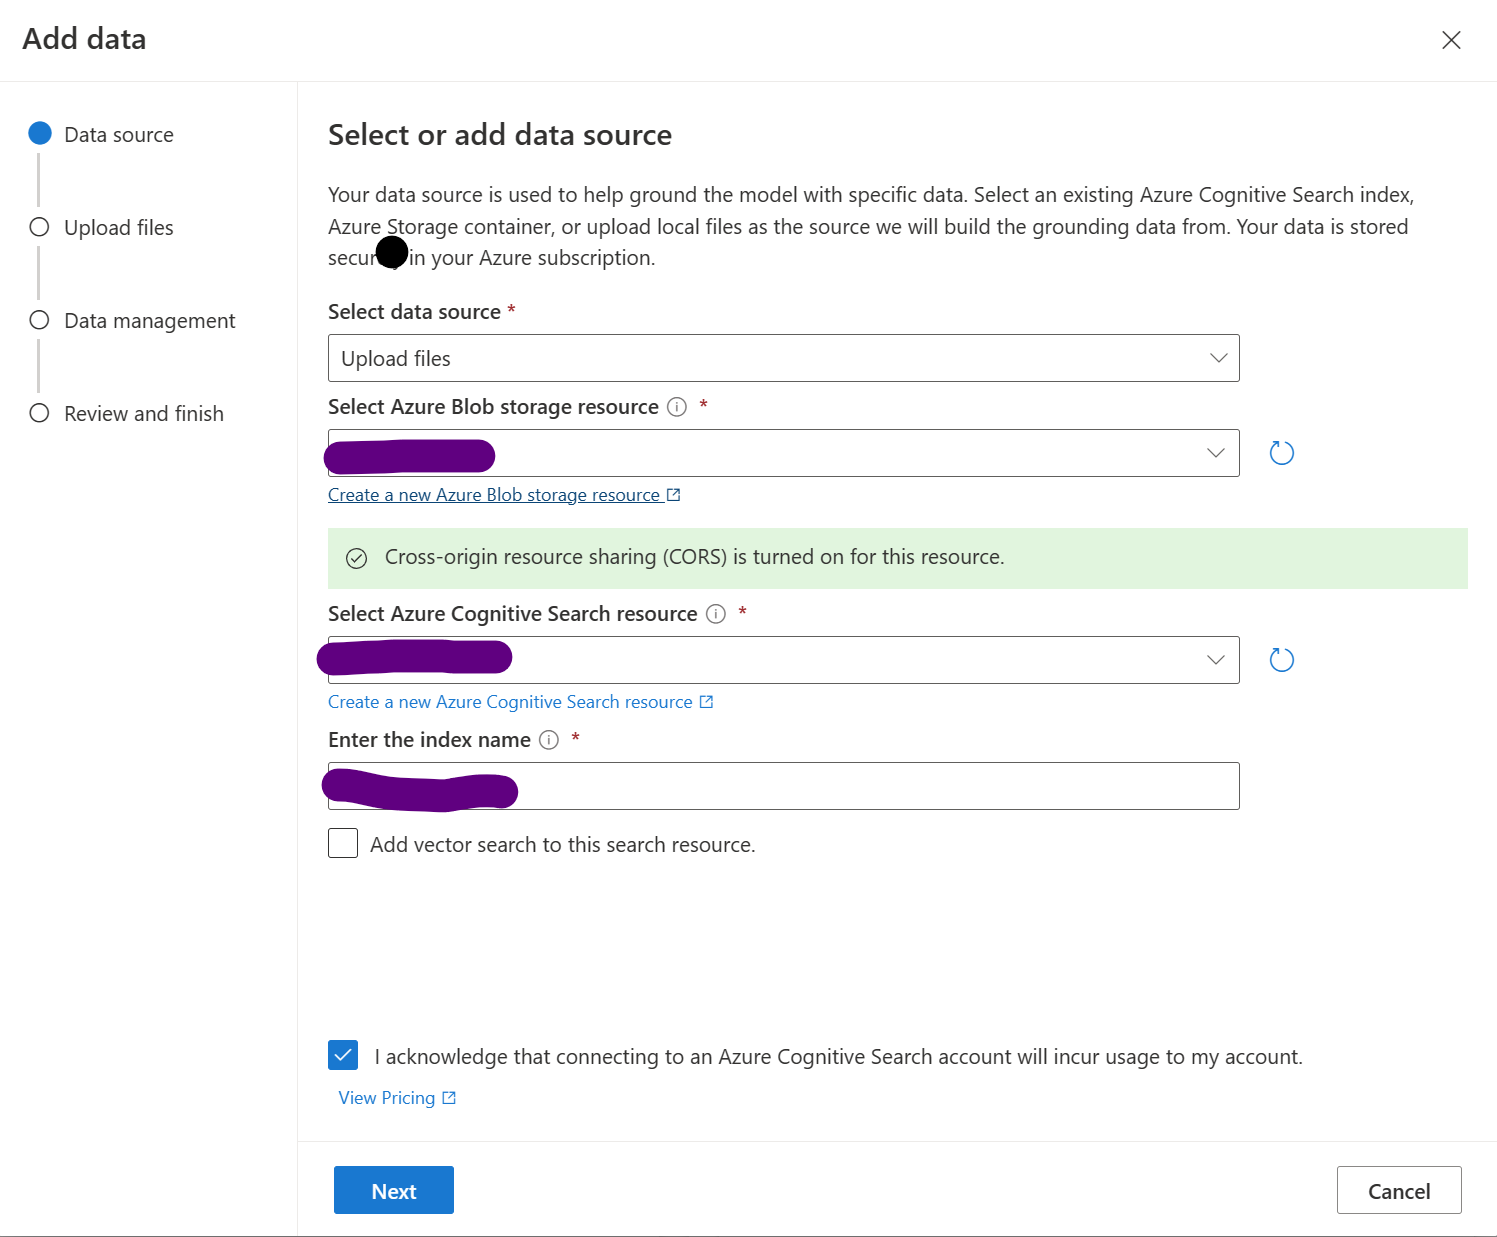
Choose “Upload files” and follow the wizard to create an “Azure Blob Storage,” an “Azure Cognitive Search Resource” with the ARM templates of the wizard.
-
Enable CORS
-
and assign a meaningful name to the search index.
-
After acknowledging the information, click “Next.”
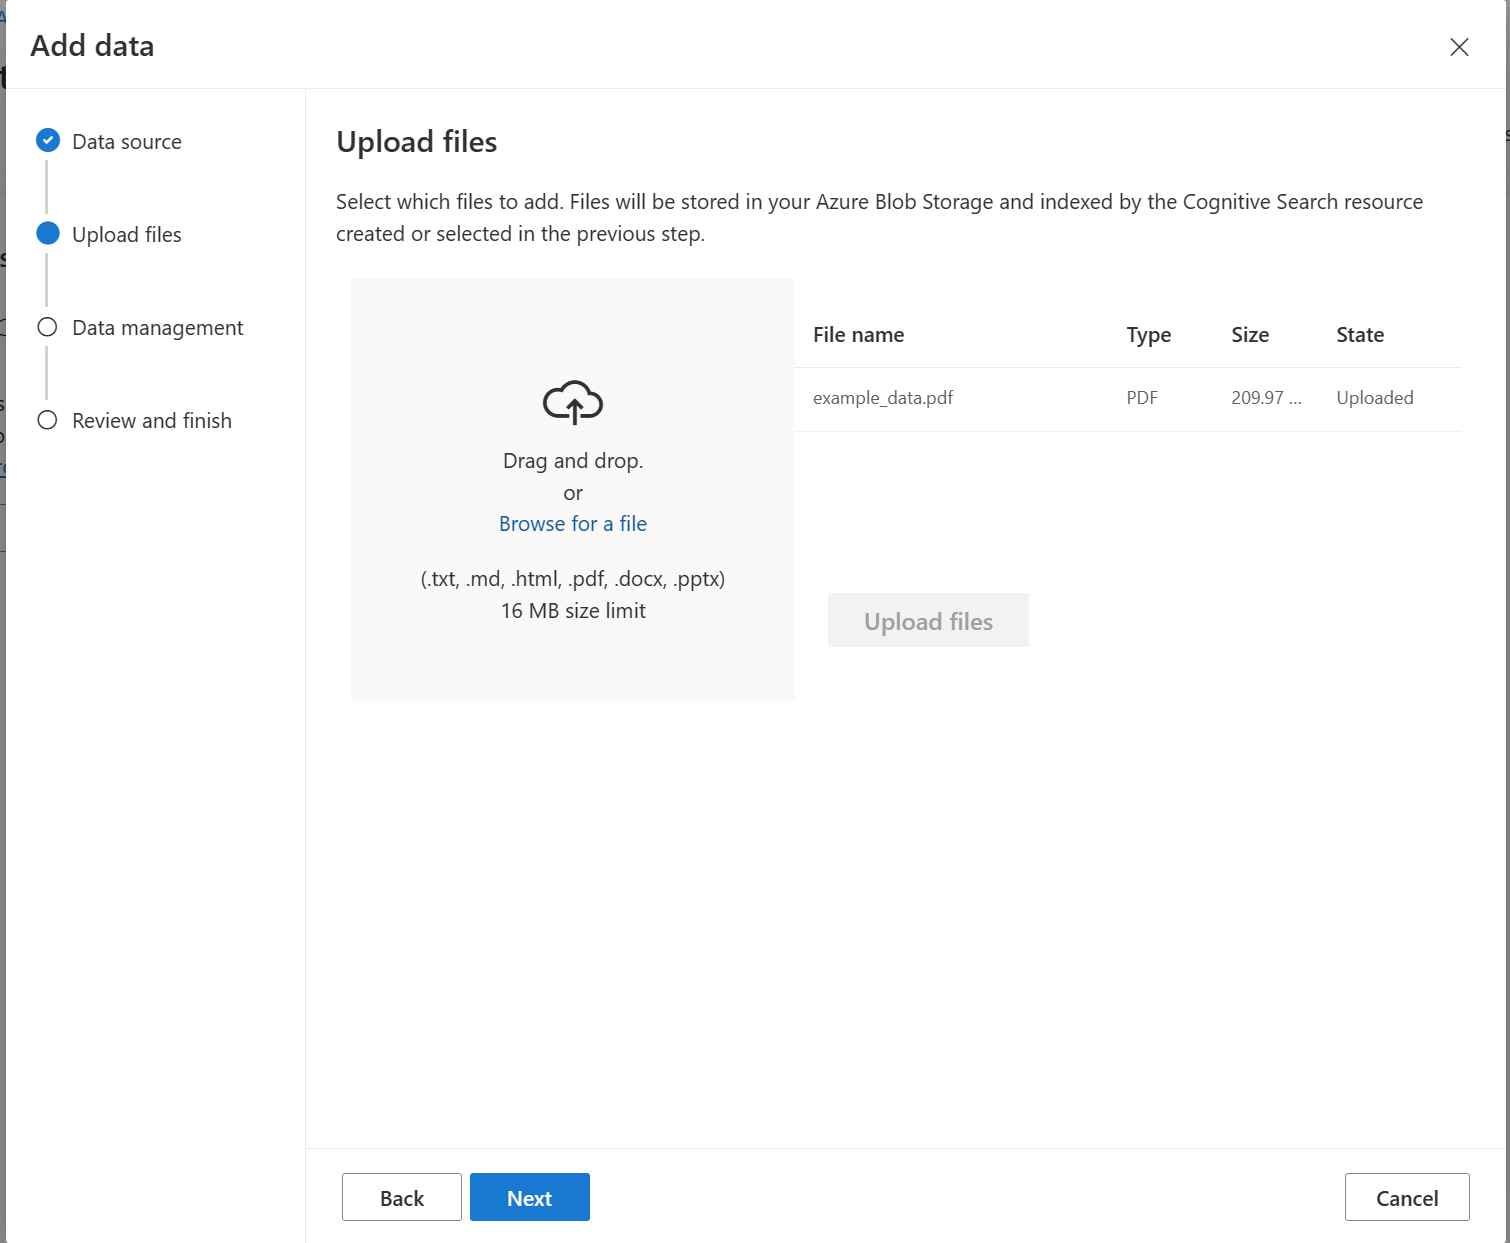
- Next, upload some test data to the blob storage to test the installation.
- After finishing the upload, everything will be created in the background, and the Assistant setup tells you to wait some minutes
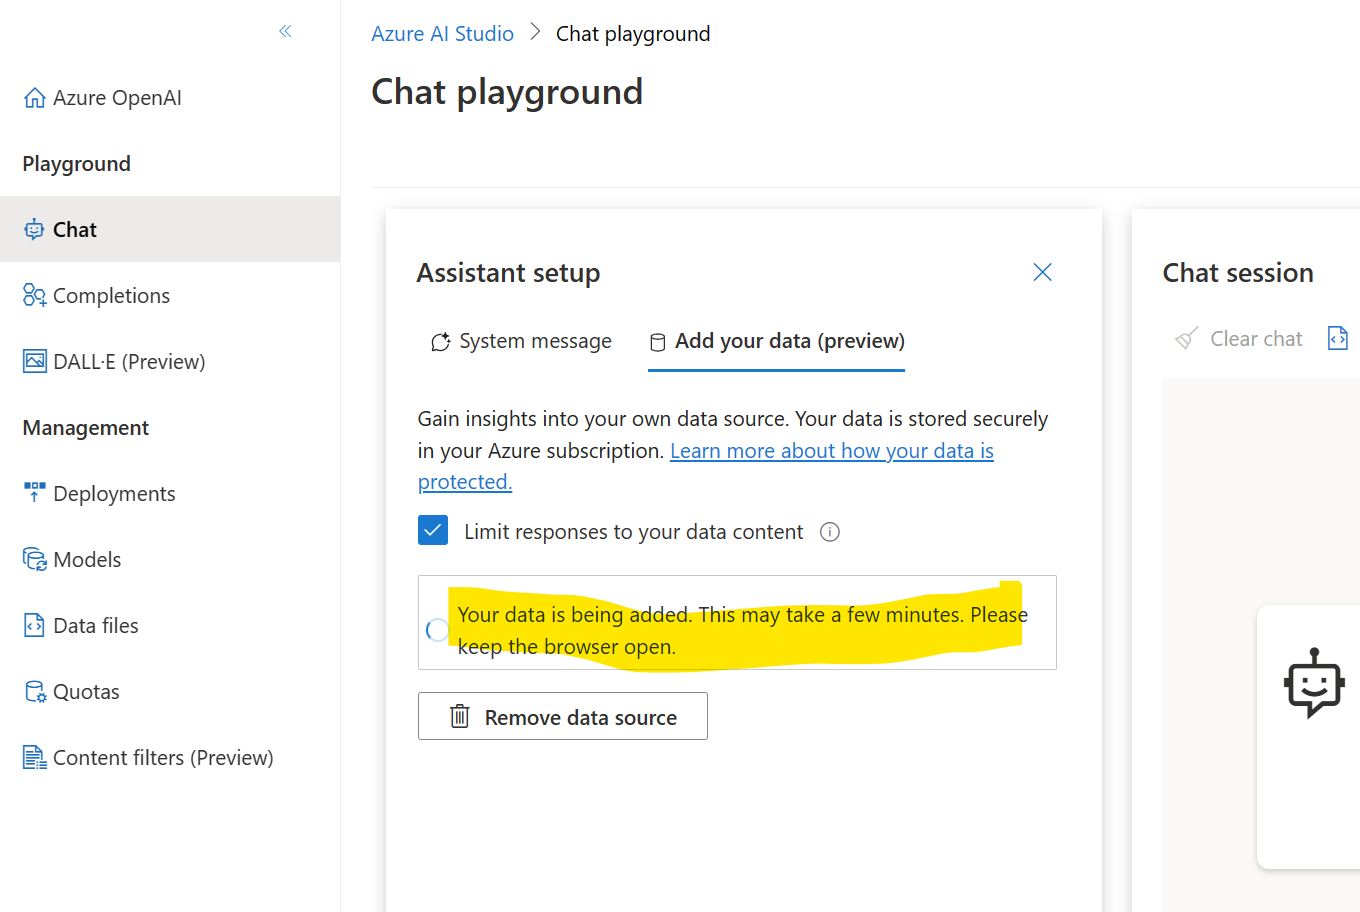
Once the wizard has completed its task, you’ll see the created resource in the status window beneath the wizard. You can then restrict the response to your data and verify its functionality with a brief chat session.
Add the resources to the ownGPT web interface
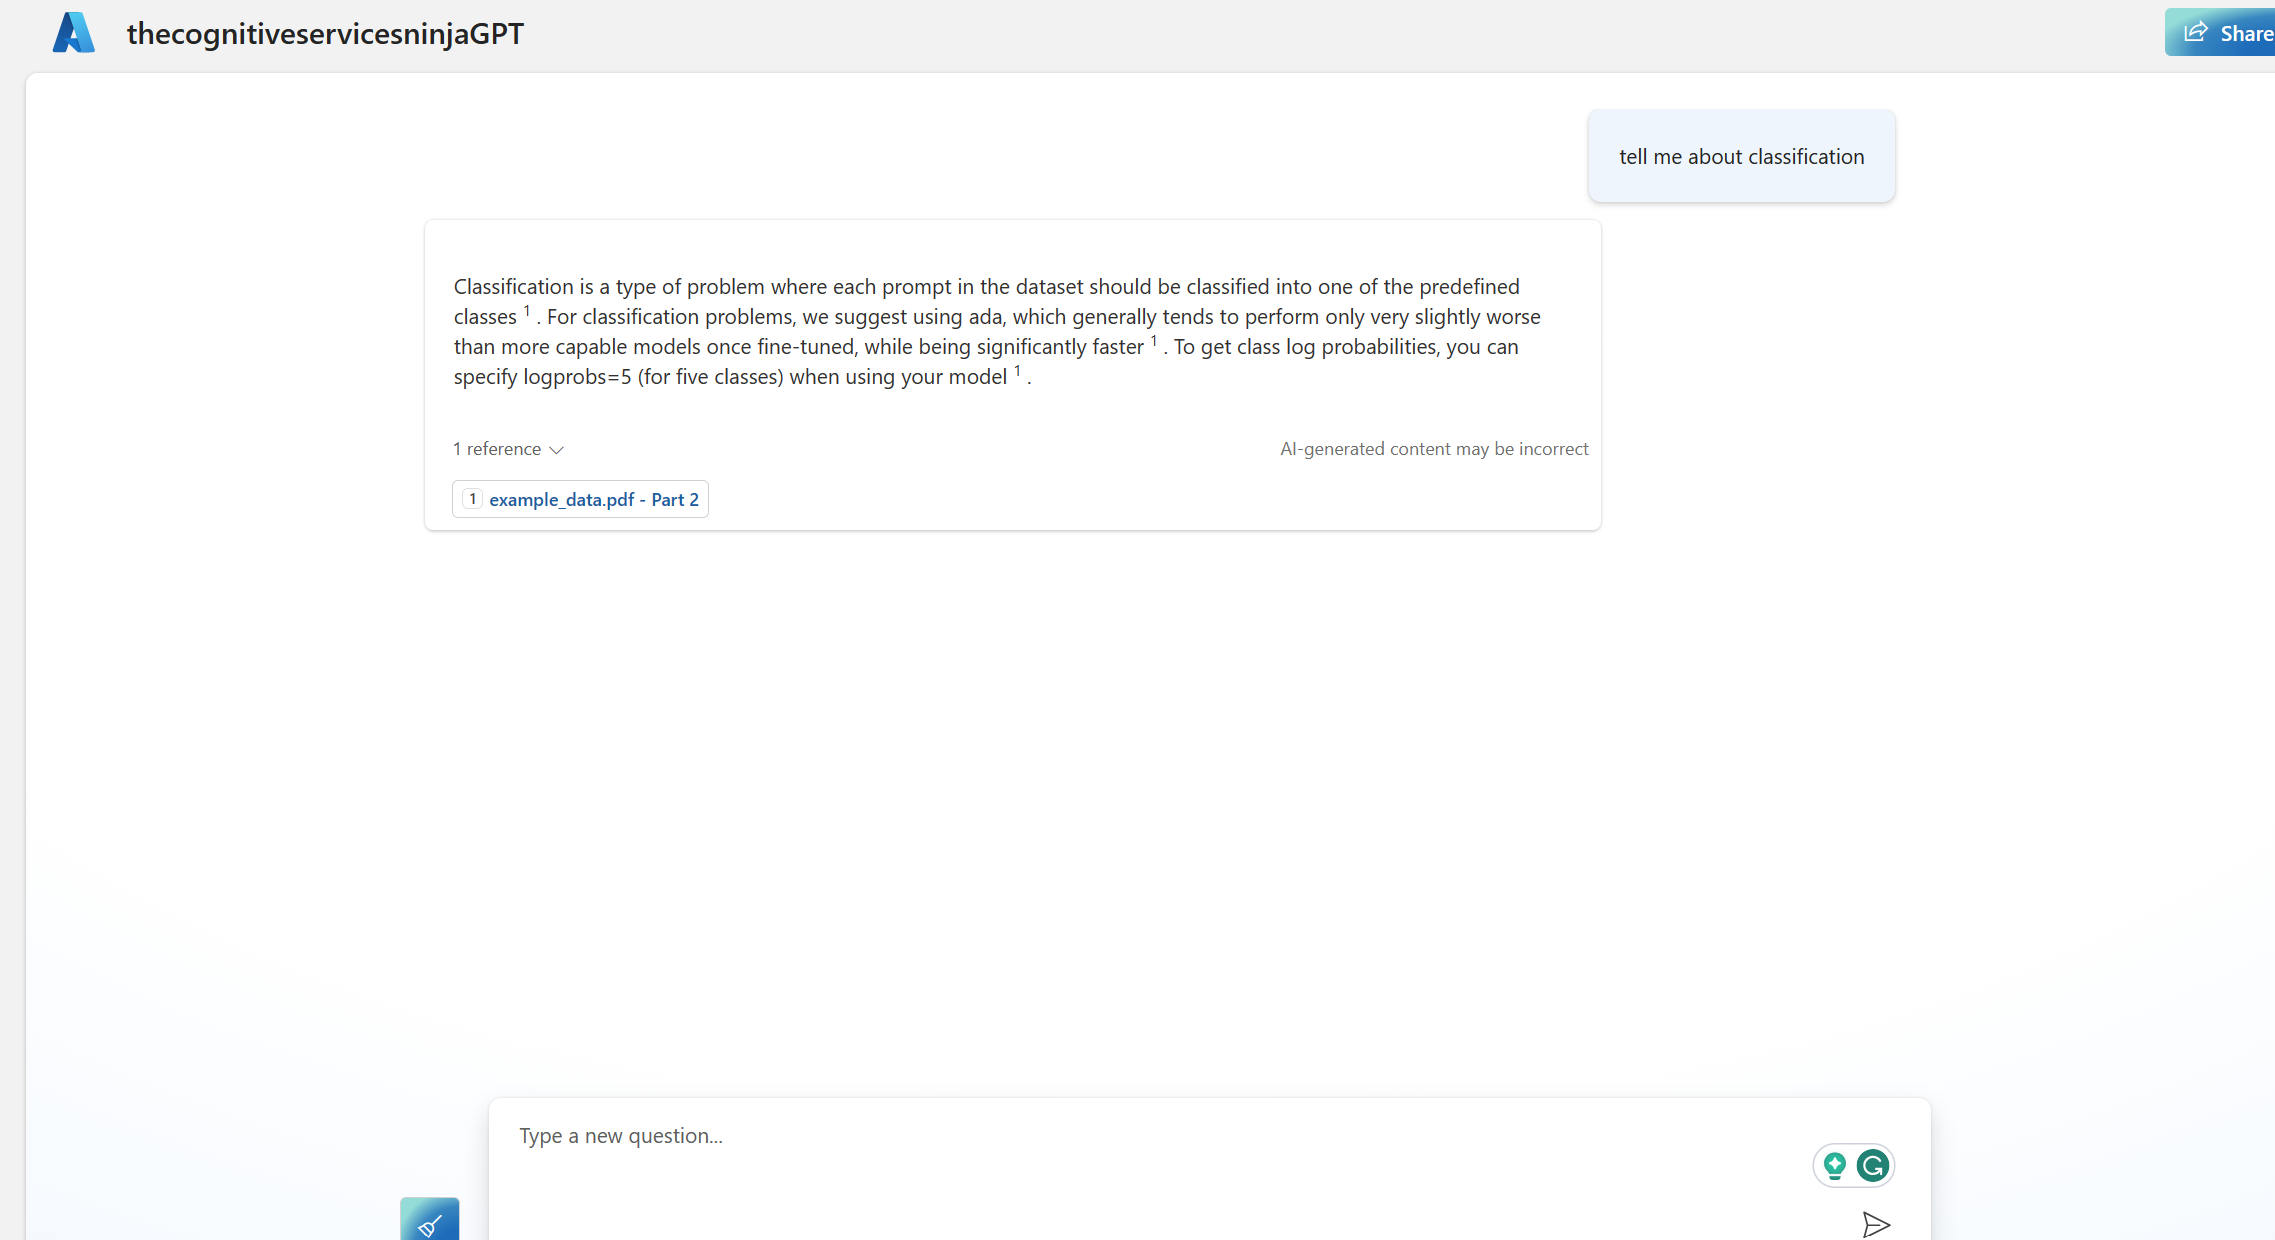
Test it locally first
Update your .env file and add the following details:

restart your ownGPT by executing ./start.cmd
and try it in your browser at https://127.0.0.1:5000
The result should look similar to the picture below
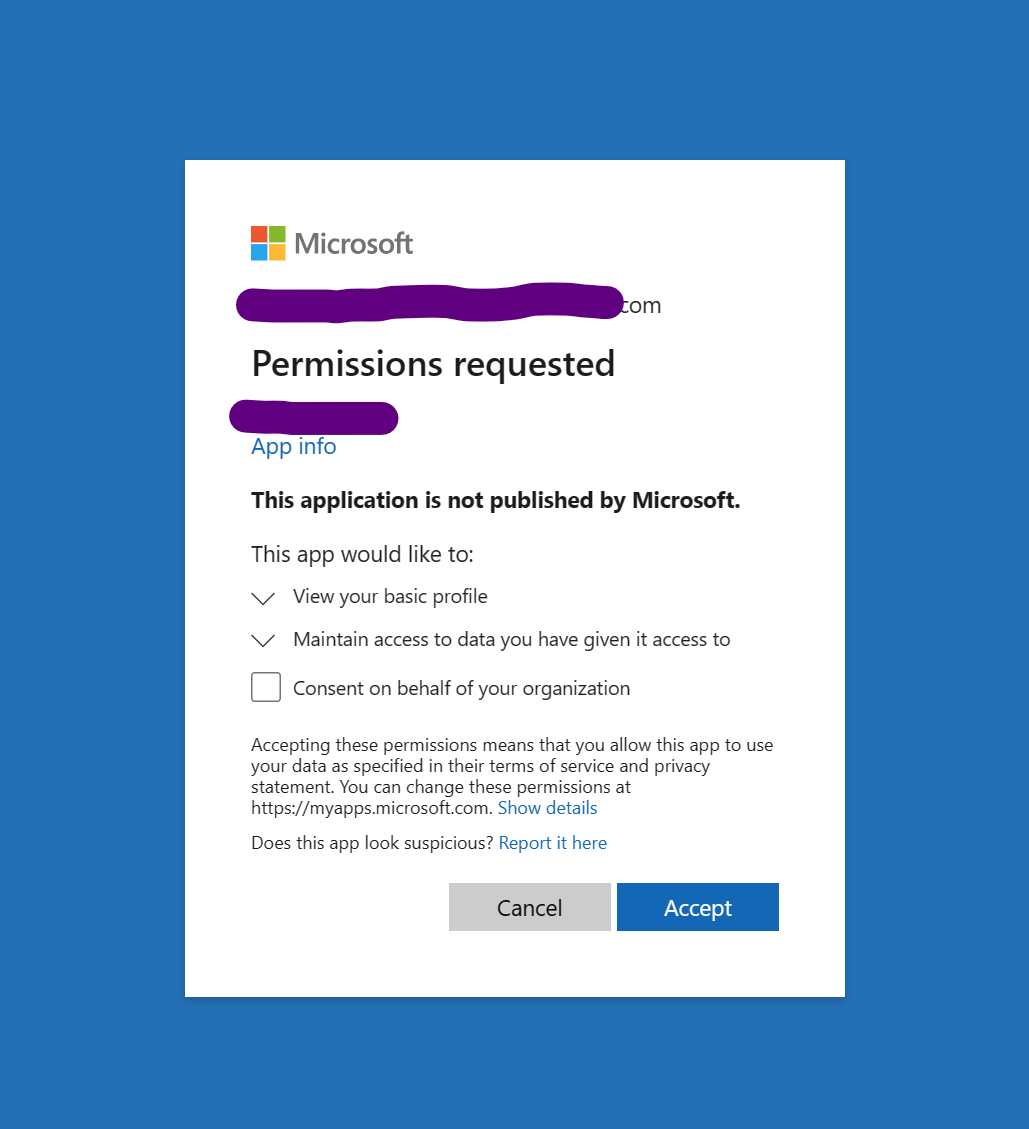
Update the config of the Web App
- go to Settings / Applications, and add the “AZURE_Search*” elements from before as application settings. Do not forget to restart the web app.

-
Test the web app in a private browser and see that your identity provider kicks in.
-
The test in the web chat should then give you the same result as testing the chat interface locally.
Things you should consider
With this configuration, all information is visible to all of your authenticated users; you should now limit access to information by introducing “document-level access control”.
Another step will be to use semantic search instead of keyword search. I will cover this in a later article in this series.
What’s next
Within the following weeks, we will explore together the following elements of creating your “ownGPT”
-
implementing chat history
-
adding semantic search
-
adding additional channels
Conclusion
Incorporating your own data into your chatGPT clone using Azure OpenAI Service and other Azure services can enhance its relevance and personalization. By following the steps outlined in this article, you can easily add your data, test it locally, and update your web app configuration. Remember to consider document-level access control to ensure that sensitive information is only accessible to the appropriate users.
Start the conversation