

Table of Contents
Integrating a Microsoft CoPilot Studio Copilot into a Microsoft SharePoint site can significantly enhance user experience and productivity. This assistant can provide real-time assistance to users, guiding them through the site, answering their questions, and helping them complete tasks more efficiently.
One way to integrate the CoPilot into your SharePoint site is to use a SharePoint SPFx component. Within a Microsoft GitHub Repository, you will find the SharePointSSOComponent project, a code sample for a SharePoint SPFx component (an Application Customizer) displaying a copilot at the bottom of all pages on a specific site. This SPFx component uses the MSAL library to perform a silent login and shares the user’s token with Microsoft CoPilot Studio, providing a seamless single sign-on experience.
Link to Repository: microsoft/CopilotStudioSamples (github.com)
find the Component in the subdirectory “SharePointSSOComponent”
All credit for the SPFx Component should go to the original author.
How to implement
-
Create an App Registration in Azure: Navigate to the Azure portal. Once there, you’ll need to create a new App Registration. This step is crucial as it allows your application to communicate with the Azure platform. During this process, you’ll be asked to provide basic information about your application, such as its name, supported account types, and redirect URI. After you’ve filled in these details, click on the “Register” button to create the App Registration.
-
Configure the Authentication Settings for your CoPilot in CoPilot Studio: After creating the App Registration, you’ll need to configure the authentication settings for your CoPilot in CoPilot Studio. This involves specifying the authentication protocol, the identity provider, and credentials.
-
Create an App Registration for your SharePoint Site: Similar to the first step, you’ll need to create an App Registration for your SharePoint site. This allows your SharePoint site to communicate with Azure and authenticate users. The process is similar to the first step, but you must specify the details relevant to your SharePoint site.
-
Clone the Repository and Navigate to the SharePointSSOComponent Folder: Now, you’ll need to clone the Repository that contains the necessary code for the SharePoint SSO Component.
You can do this by running the command.
git clone https://github.com/microsoft/CopilotStudioSamples.git
In your terminal. After cloning the Repository, navigate to the SharePointSSOComponent folder by running the command.cd SharePointSSOComponent. -
Install the Dependencies and Build the Component: Finally, you’ll need to install the necessary dependencies for the SharePoint SSO Component, add customizations to the Component, and build it.
Please find a detailed description within the Repository. Please be careful and read all the steps and side documents while implementing. Take an extra minute to ensure you have the correct version of NodeJS. Use either v16 or v18.
After following all the steps,
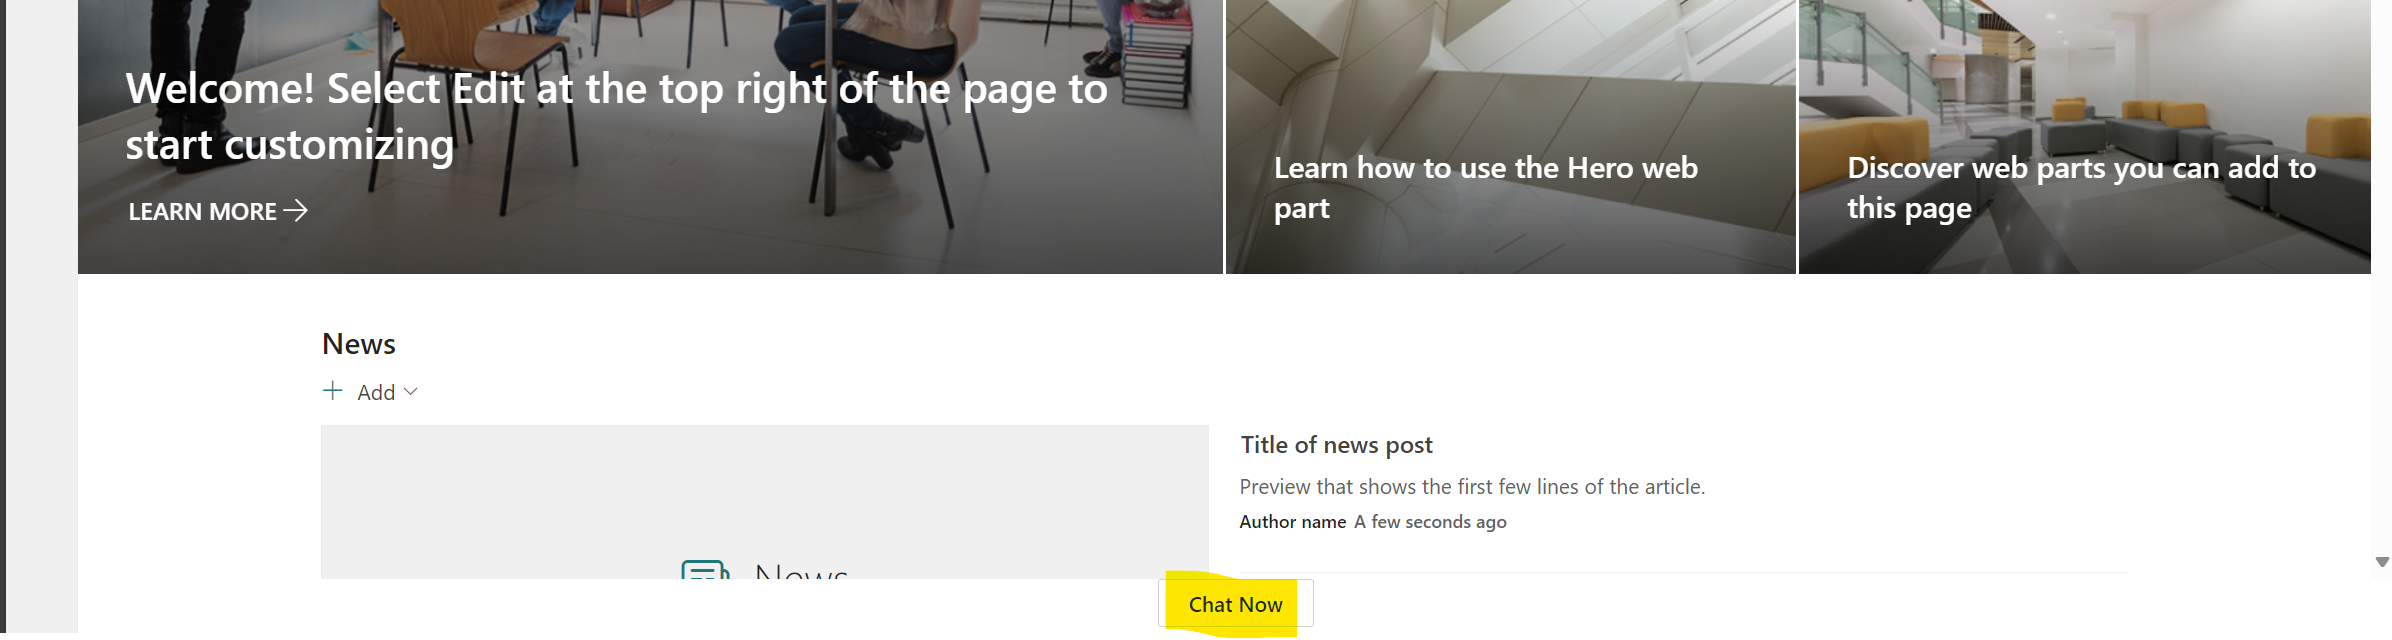
Press the button on the bottom and enjoy your bot on SharePoint

Conclusion
Integrating a Microsoft CoPilot Studio Copilot into a SharePoint site significantly improves user experience and productivity. By leveraging the SharePoint SPFx component and the MSAL library, users can enjoy a seamless single sign-on experience. The process involves creating App Registrations in Azure, configuring authentication settings in CoPilot Studio, cloning the Repository, and building the Component. With careful implementation, users can efficiently navigate and perform tasks on the SharePoint site with the assistance of the CoPilot.
Start the conversation