

%20for%20Microsoft%20Power%20Platform%20-%20A%20Comprehensive%20Guide%20(Part%202%20-%20environment%20setup))
Table of Contents
This is the second part of a series of articles, part 1 (basics and background) was published before.
Reminder: Environment strategy
You must establish separate app development and production environments to adhere to application lifecycle management (ALM) principles. While basic ALM can be achieved with separate development and production environments, I recommend maintaining at least one additional test environment distinct from your development and production environments. A separate test environment enables end-to-end validation, encompassing solution deployment and application testing. Some organizations may require additional settings for user acceptance testing (UAT), systems integration testing (SIT), and training.
Distinct development environments can be beneficial in isolating changes from one work effort before it is completed, preventing premature check-ins. They can also help reduce instances where one person’s changes negatively impact another’s work.
Every organization is unique, so carefully assess your organization’s specific environmental needs.
There are several methods for establishing Application Lifecycle Management. We will focus on a lightweight approach in the first part of the series.
Prepare the basics
Creating developer environments
-
Go to make.powerapps.com
-
At the sign-in screen, input your account details and click “Sign in.”
-
If prompted to stay signed in, select “Yes.”
You now were logged in and on the Power Apps Home Page.
Developer environments are extremely useful for testing features or simply developing a solution, as they are designed to be short-lived environments. You should never work within your default environment, as it is intended to serve as a personal productivity playground.
-
In this series, we will create three distinct developer environments:
Dev: The environment where we develop a solution.Test: The environment where we test the solution.Prod: The environment where we deploy our solution for production. -
To create developer environments, there are two methods available:
-
Through the Power Platform Admin Center
-
Using the Power Platform Command Line Interface (CLI)
Here, we will create the environments using the Power Platform Admin Center.
-
Navigate to the Power Platform Admin Center.
-
Close the Welcome/Tour pop-up by clicking the “X” in the top right corner of the pop-up screen.
-
-
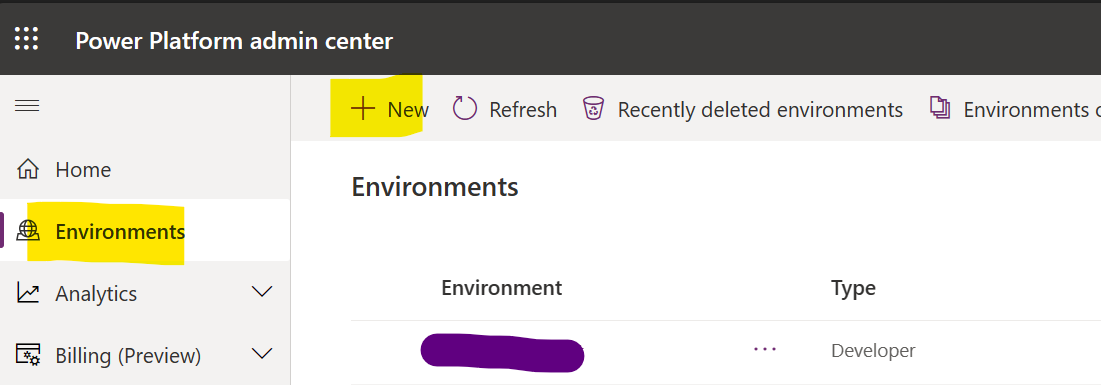
Click on “Environments” in the left navigation.
-
Click on “New” in the top navigation.
-
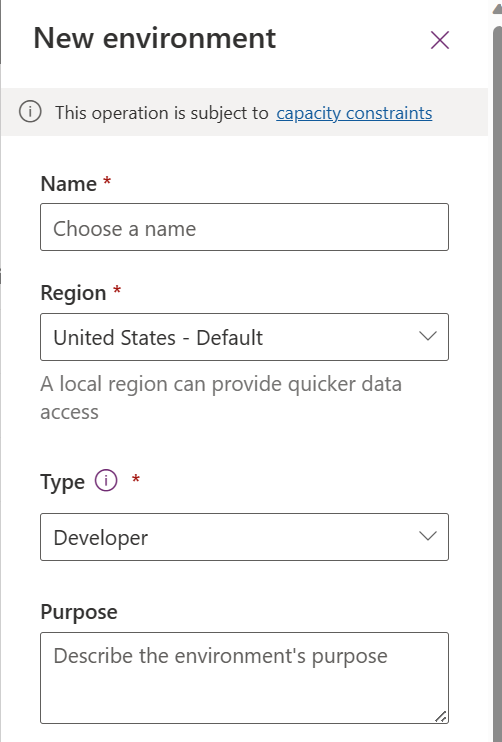
When the dialog window appears on the right-hand side, enter the following information:
Name: Dev
Region: (choose your preferred region)
Type: Developer
Purpose: (a description of your choice)
-
Select “yes” to add dataverse data store, and select “Next” and “Save”
-
repeat the same for a
test (test)and for aproduction (prod)environment
Creating a GitHub account (if you didn’t have one)
-
Go to the GitHub website
-
Click on “Sign up” in the top right corner.
-
Enter your email address (use your personal email address) and click “Continue.”
-
Create a password and then click “Continue.”
-
Enter a username and then click “Continue.”
-
Choose whether you want to receive product updates or not, and then , and then click “Continue.”
-
Solve the puzzle to verify your account, solve the puzzle, and click “Create an account.”
-
Enter the code that was sent to your email address, and then proceed to the welcome screen
Creating a repository
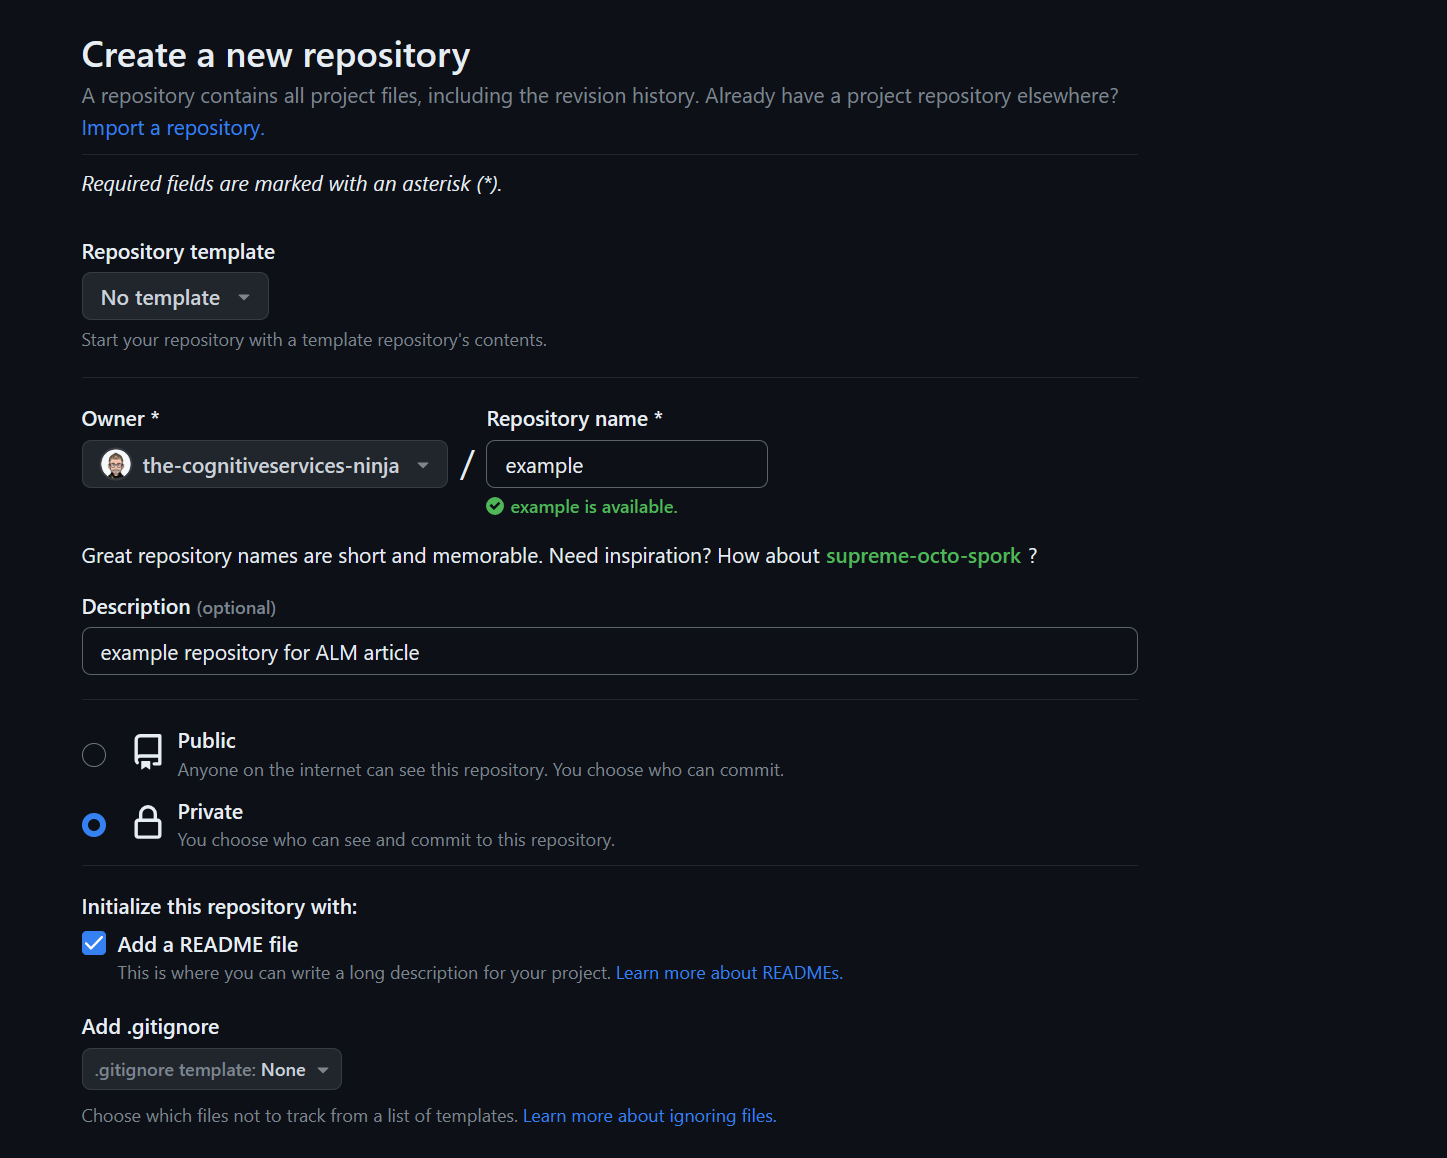
- Create a new repository with a meaningful name
Creating a codespace
A codespace is a cloud-hosted development environment accessible from anywhere. It includes everything you need, such as a text editor, terminal, and debugger. Codespaces are powered by Visual Studio Code and operate in a containerized environment. Utilizing a codespace enables you to work independently of location and maintain a clean working environment.
-
Navigate to your newly created repository, locate the <> Code button, and click on it.

-
In the Code pop-up, select the “Codespaces” tab.
-
Click on “Create codespace on the main”.
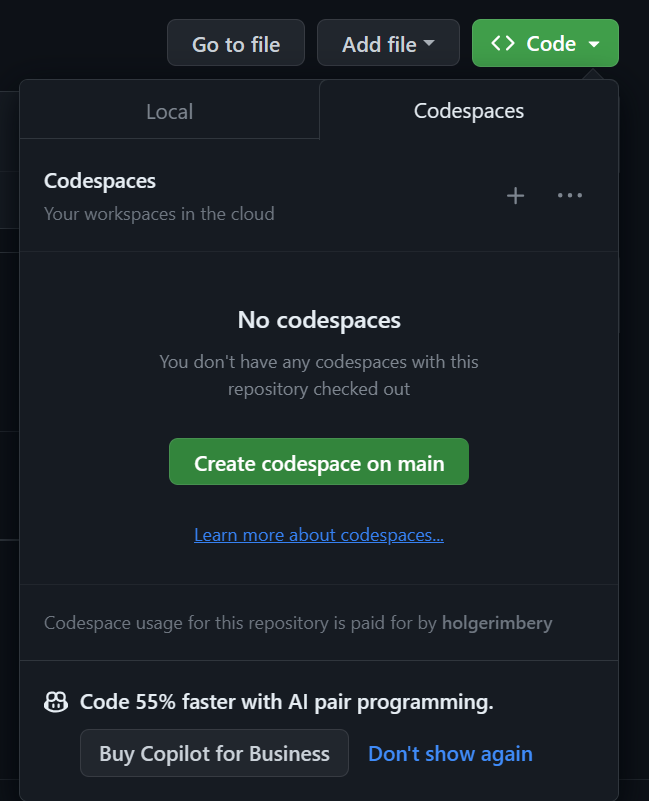
A codespace will be created for you in a new tab. This process might take a few seconds. Upon completion, you will have a fully functional Visual Studio Code environment within your browser.
Installing the Power Platform Tools extension
To work with your solution and save it to the repository, you need to install the “Power Platform Tools” extension.
-
Select the “Extensions” icon on the left.
-
Type “Power Platform Tools” into the search box.
-
Click “Install.”

Connecting to the Power Platform environment
Remember, this is only the first step, later we will work with pipelines and proper authentication with a service account.
-
Click on the Power Platform icon in the left navigation.
-
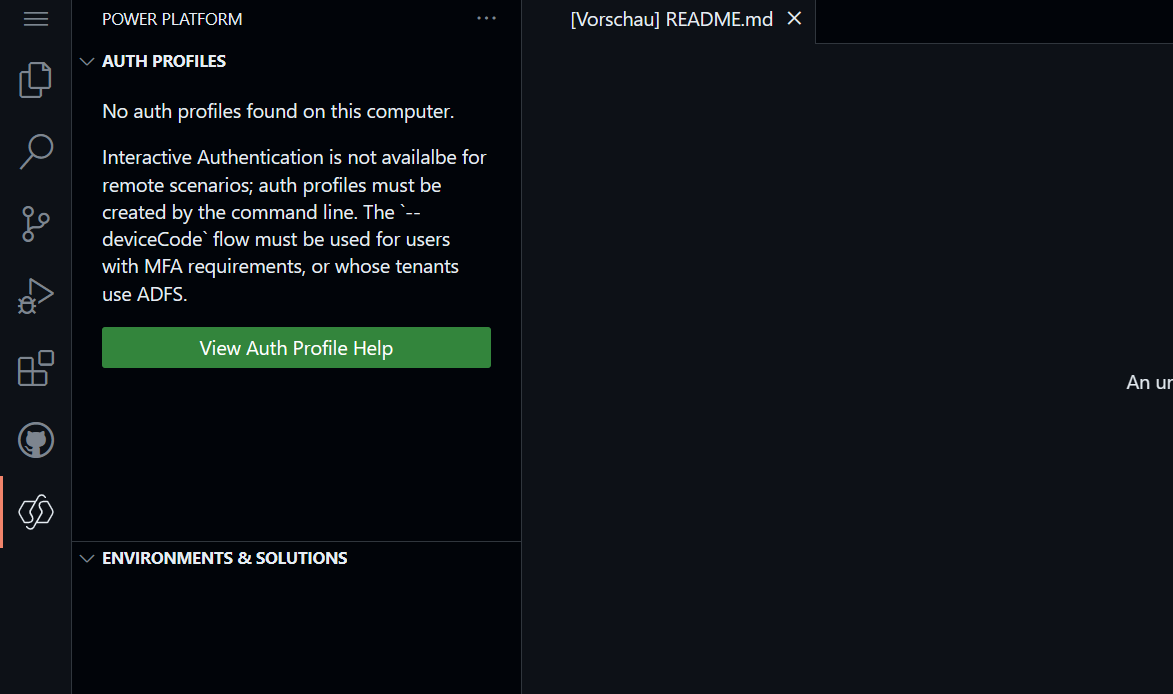
You will notice that it says, “No auth profiles found on this computer.” We will create one.
-
Click on the hamburger menu icon in the top left corner, then hover over “Terminal” and click “New Terminal.”
-
A terminal window will now open for you.
-
Type the following command in the terminal and press Enter:
pac auth create --deviceCode -
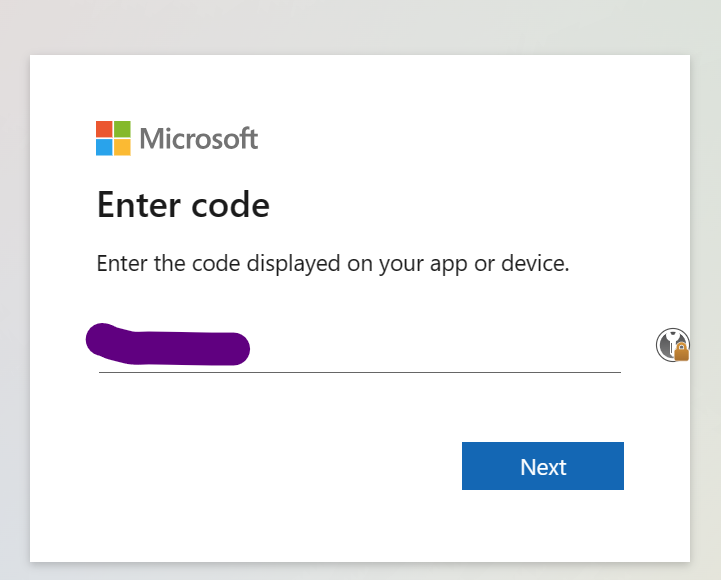
You will be prompted to use a web browser for authentication. Copy (Ctrl + C) the code provided in the terminal, and then Ctrl + click on the link also provided in the terminal.

-
Once you click on the link, a new browser tab will open. Paste the code into the browser and click “Next.”
-
Sign in. Click “Continue.”
-
You will see a prompt confirming that you have successfully signed in to the Power Platform CLI - pac. Close the browser tab and return to your codespace.
-
Refresh the Auth Profiles section by clicking the “Refresh” button next to “Auth Profiles.”
-
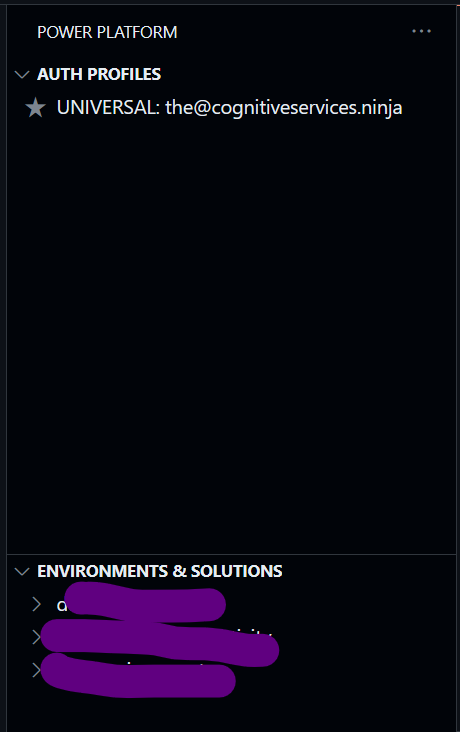
After completing these steps, you should see your Authentication Profile and your Environments, allowing you to work with your environments effectively.
-
To test this:
pac org list
You will receive a list of all the environments you have access to.
pac org select --environment "unique-name of environment"
You select your development environment and can work within this environment.
pac org who
You will receive information about your selected environment
Power Platform CLI (pac)
please find the full documentation of the tool on Microsoft Learn
Next steps
Keep an eye out for the upcoming article, where you’ll learn about solutions, creating a “solution,” and mastering the process of exporting, importing, and cloning your solutions to the repository. Additionally, you’ll discover how to work with the code in the repository, all while maintaining a lightweight approach.
Conclusion
Mastering ALM for Microsoft Power Platform is crucial for efficient app development and management. You can create a streamlined workflow by setting up separate environments, utilizing GitHub repositories, and leveraging codespaces. Stay tuned for future articles to learn more about solutions and enhance your ALM skills.
Start the conversation