

Table of Contents
Prerequisites
-
You must add a web resource and ensure the required language translation services are configured.
-
Enable call recording and transcription for the translated voice call transcripts to be displayed.
Motivation
Imagine you operate a multilingual contact center with chat. With the real-time message translation feature, agents (human and non-human) can support customers and employees in the language they elect to be serviced in without needing all agents to speak the same language.
When you enable language translation, messages between the customer and support agent - and messages among support agents who consult and collaborate internally, such as supervisors or SMEs - are translated. There will be no time delay in translating messages manually, even when the conversation starts with a non-human agent. Everybody in the chain can understand as they get displayed the dialogue in their preferred language.
Implementation
Creating a web resource for real-time translation
You need an active azure subscription for this step.
-
Deploy a translation resource and get a translation key
according to the documentation. -
Go to the Microsofts GitHub repository and download the sample web resource.
-
Edit the downloaded file and put the translation key into it.
bingTranslateApiClientSecret: '<please add your own azure translation api key>',
googleTranslateApiClientSecret: '<please add your own google translation v2 api key>',
-
Put this JavaScript file on a web resource accessible from the internet.
(e.g., an azure static webapp resource) -
Check the availability after deploying it.
Activation of Real-time translation
-
Go to your Customer Service admin center.
-
Pick productivity under Agent experience.
-
Click on “Manage” in the section “Real-time translation”.
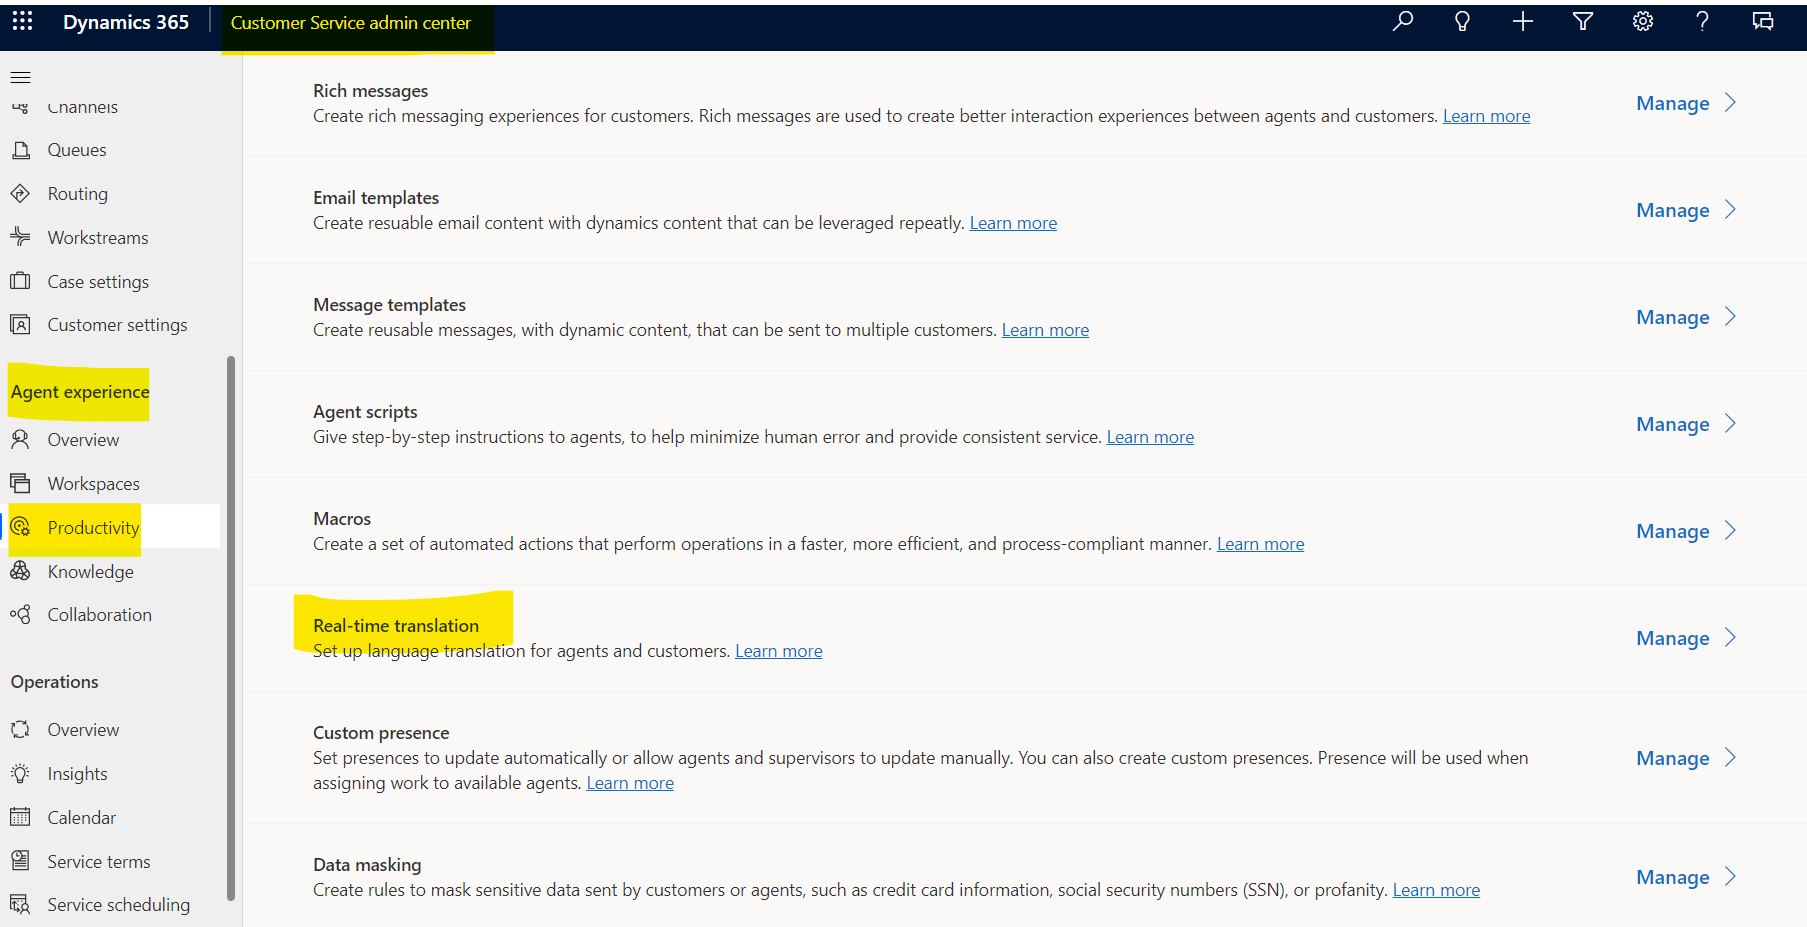
Figure 1: Select “Manage” in “Real-time translation”
-
switch the service on
-
configure the target language and Web Resource URL you deployed. before
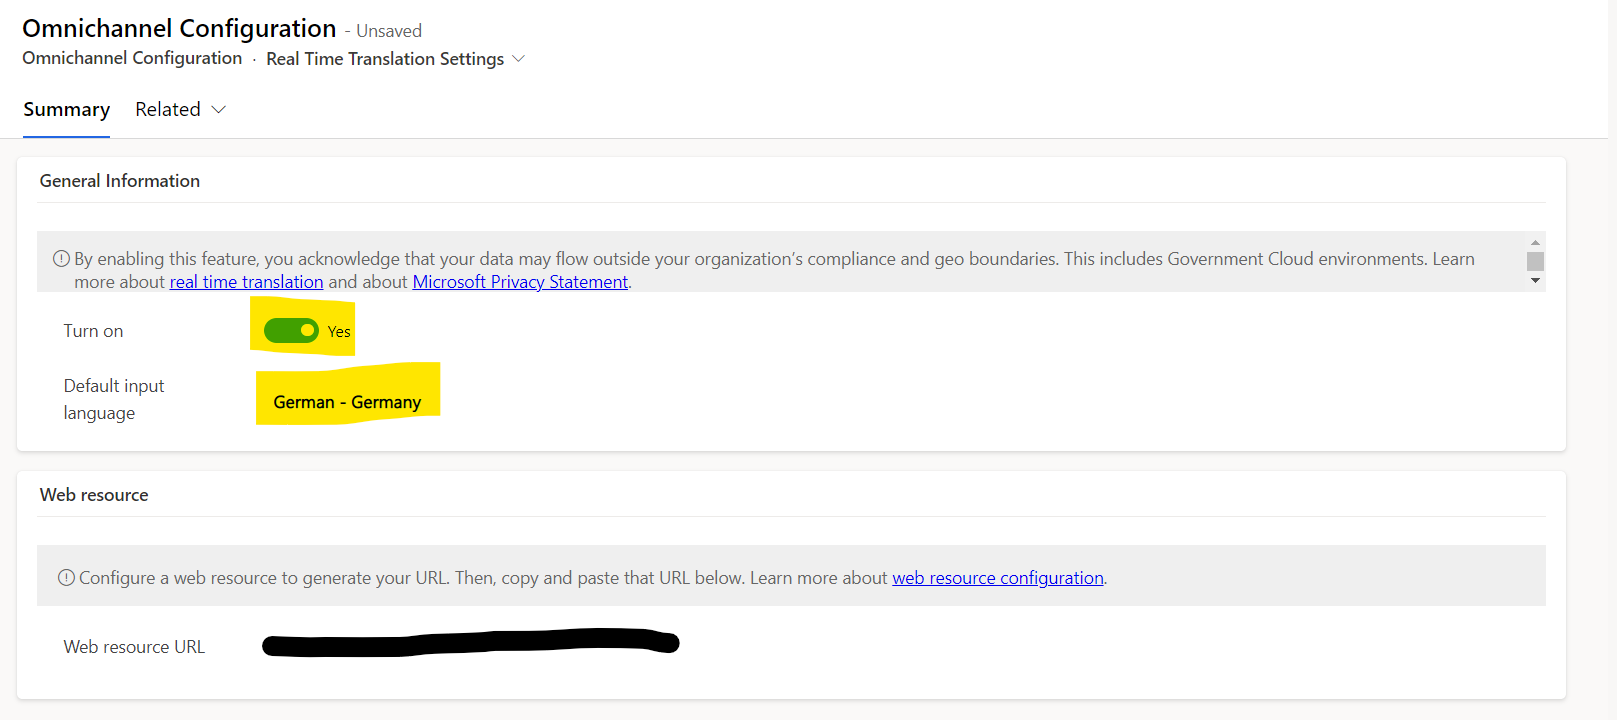
Figure 2: Configure the service.
Result
As an example - all dialogs are in English (in the screenshot, you see a caller in the voice channel talking to the voice bot and later to an human agent) and the translation is in realtime to Hindi.
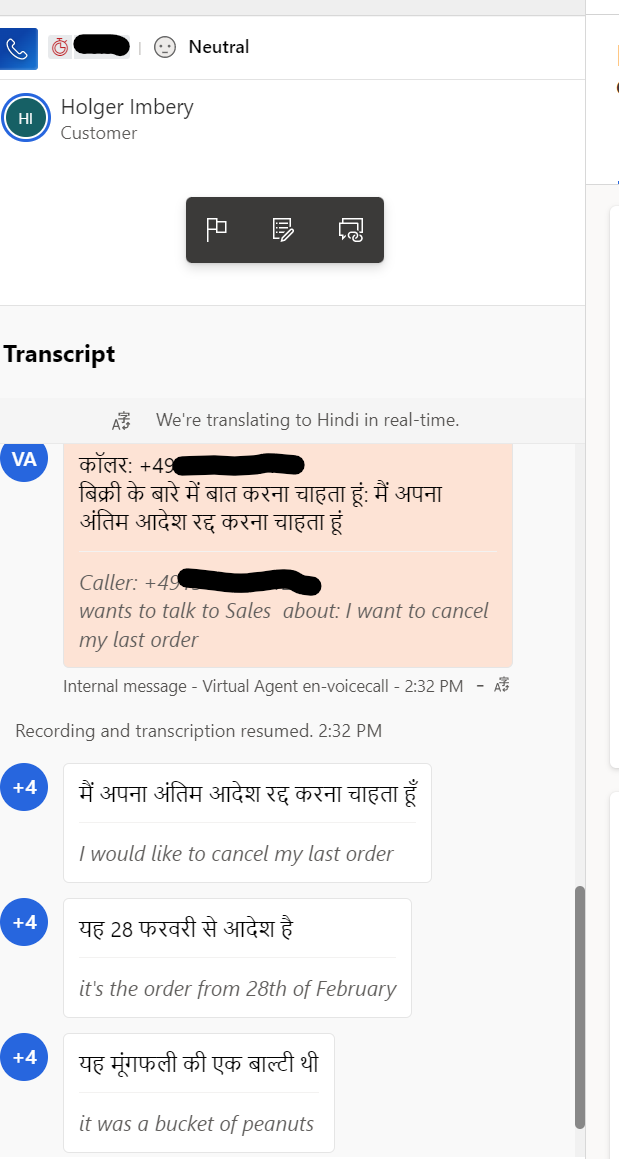
Figure: translated voice call from English to Hindi
Conclusion
You can rapidly speed up communication between your contact center agents and your Subject Matter Experts by leveraging the automatic translation of customer queries.
Start the conversation